How-to — task-oriented recipe.
Overview
- How to send an invite to potential allies
- What your potential allies will see
- How to access Affinity Alliances moving forward
- Note for Microsoft Exchange (On-Premise) or custom SSO users
- Additional Resources
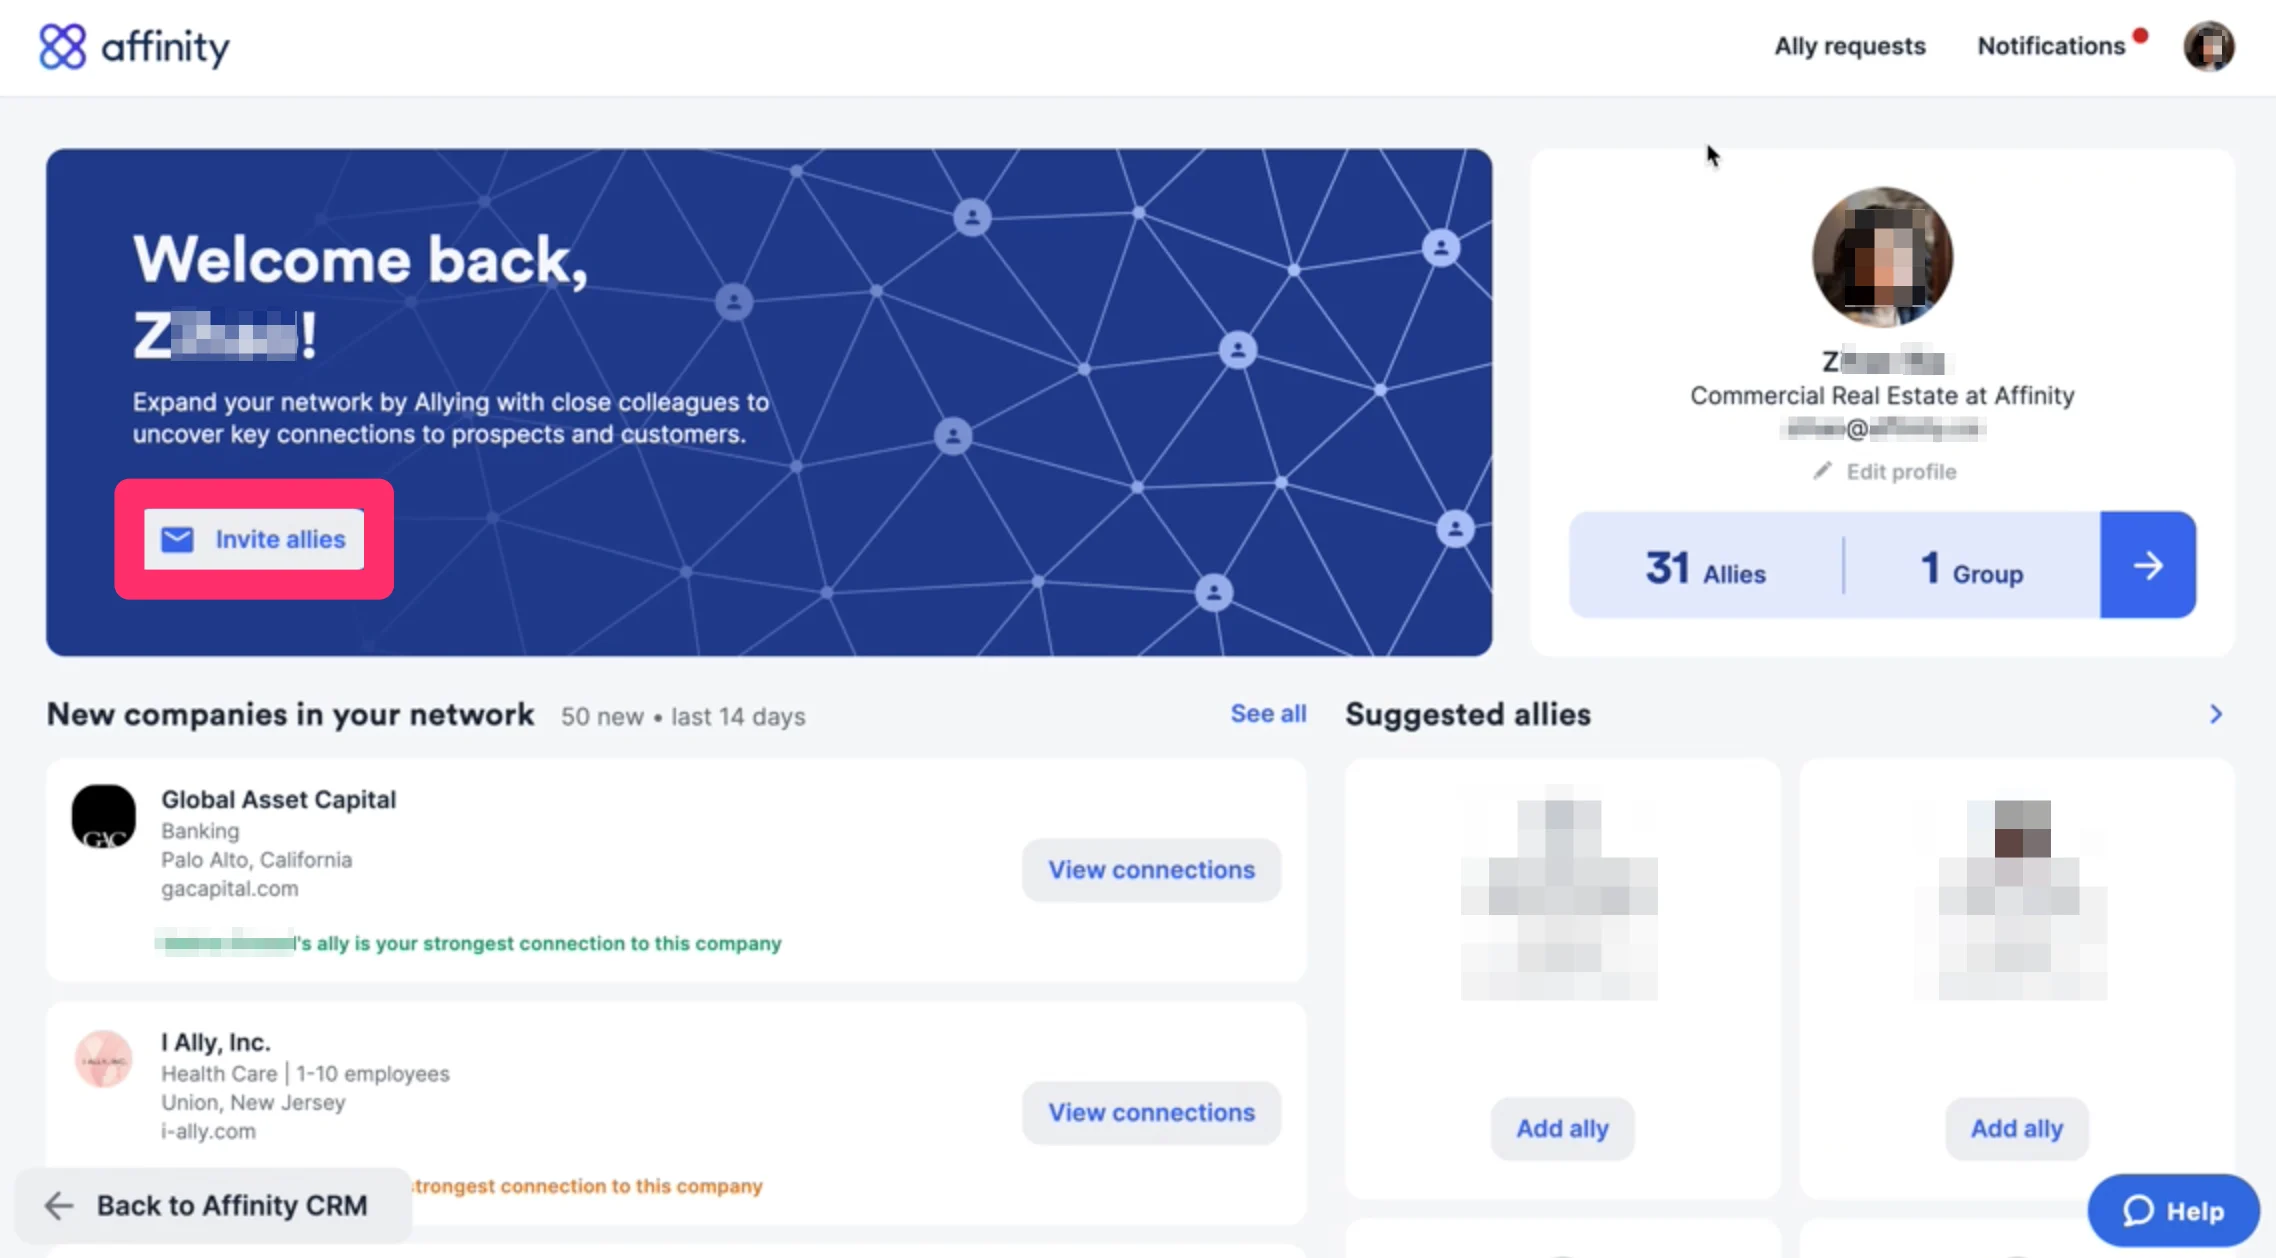
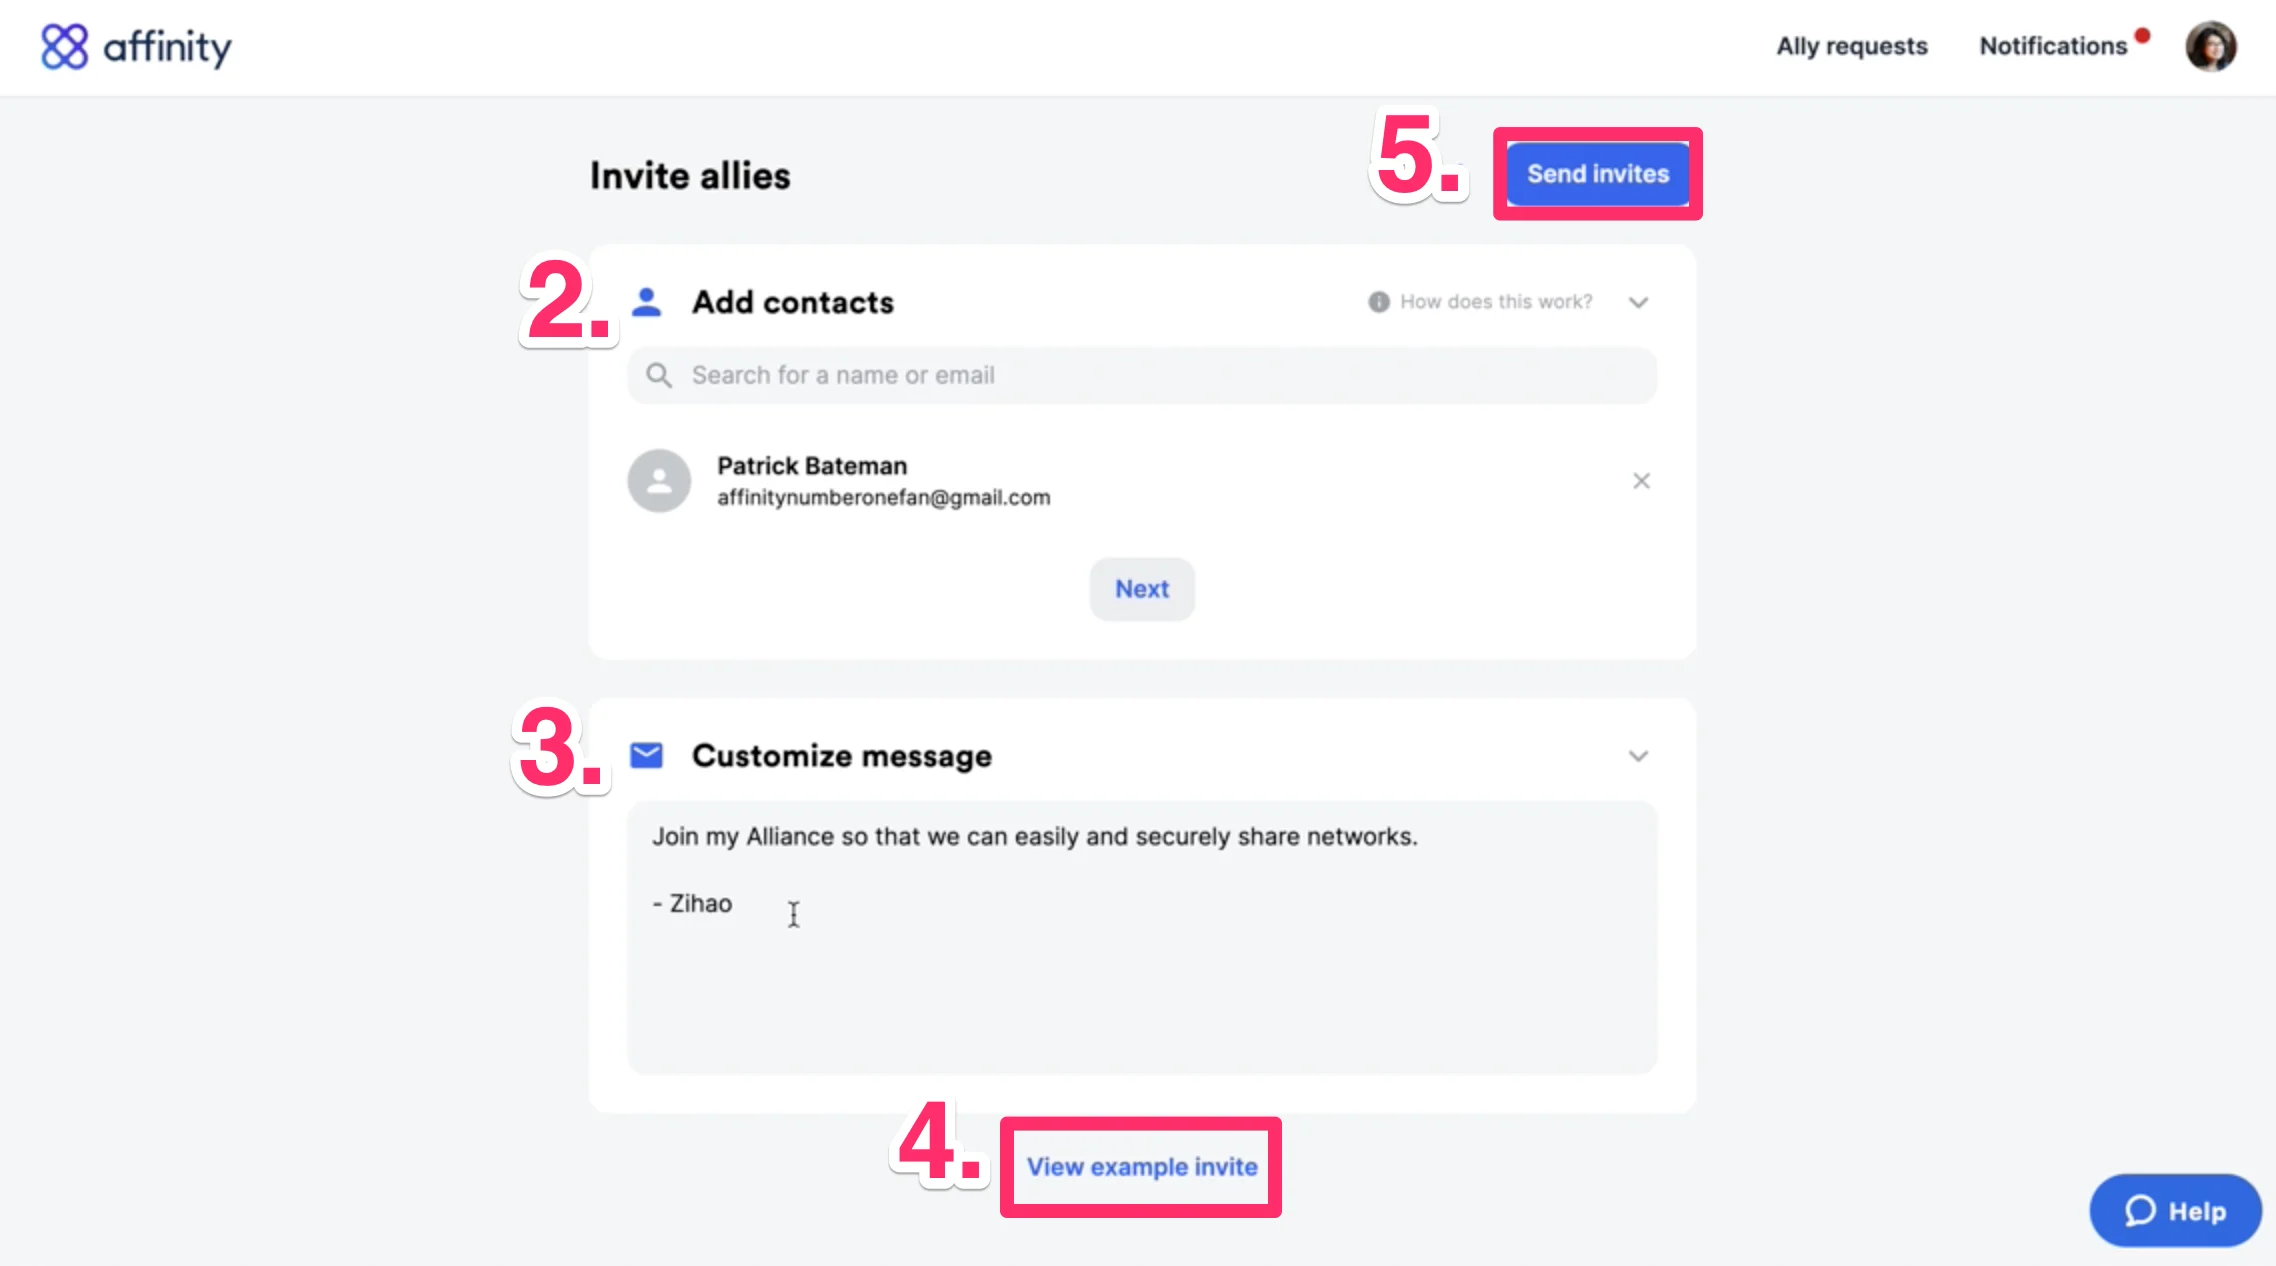
How to send an invite to potential allies
- Go to your Alliances Dashboard, then click Invite allies.
- Type in the names/email addresses of the individuals that you’d like to send invites to.
- Customize your message to add a more personal touch.
- Preview what your invite email would look like from the recipient’s point of view.
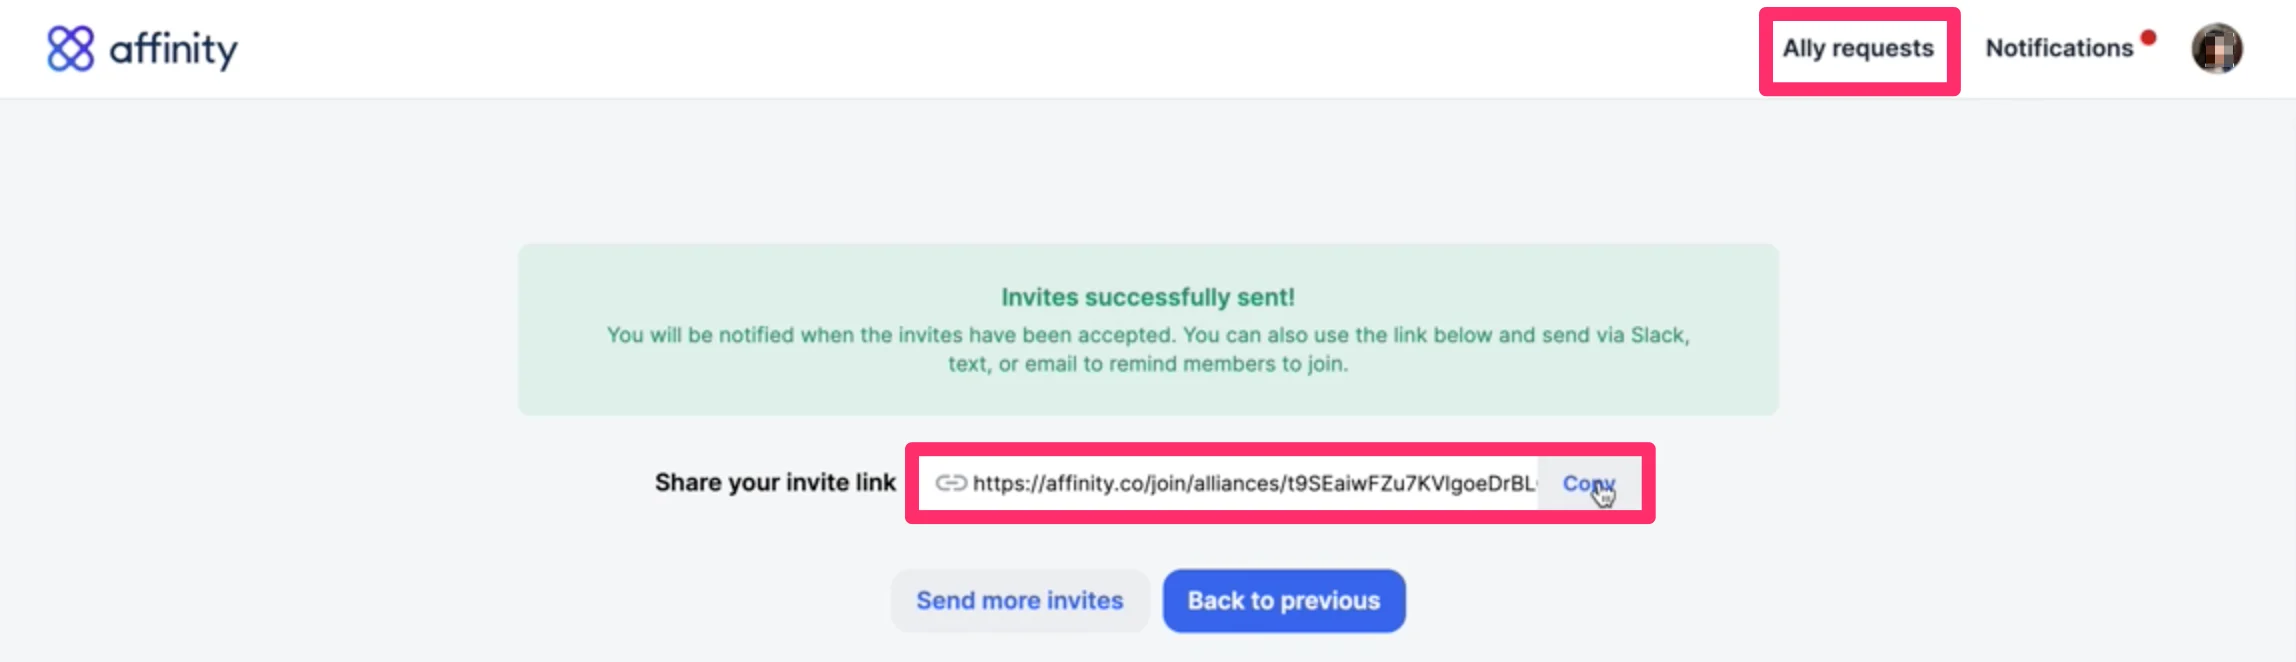
- Send invite.
- If they missed your invite, you can send them your invite link, which is also available by clicking on Ally requests.
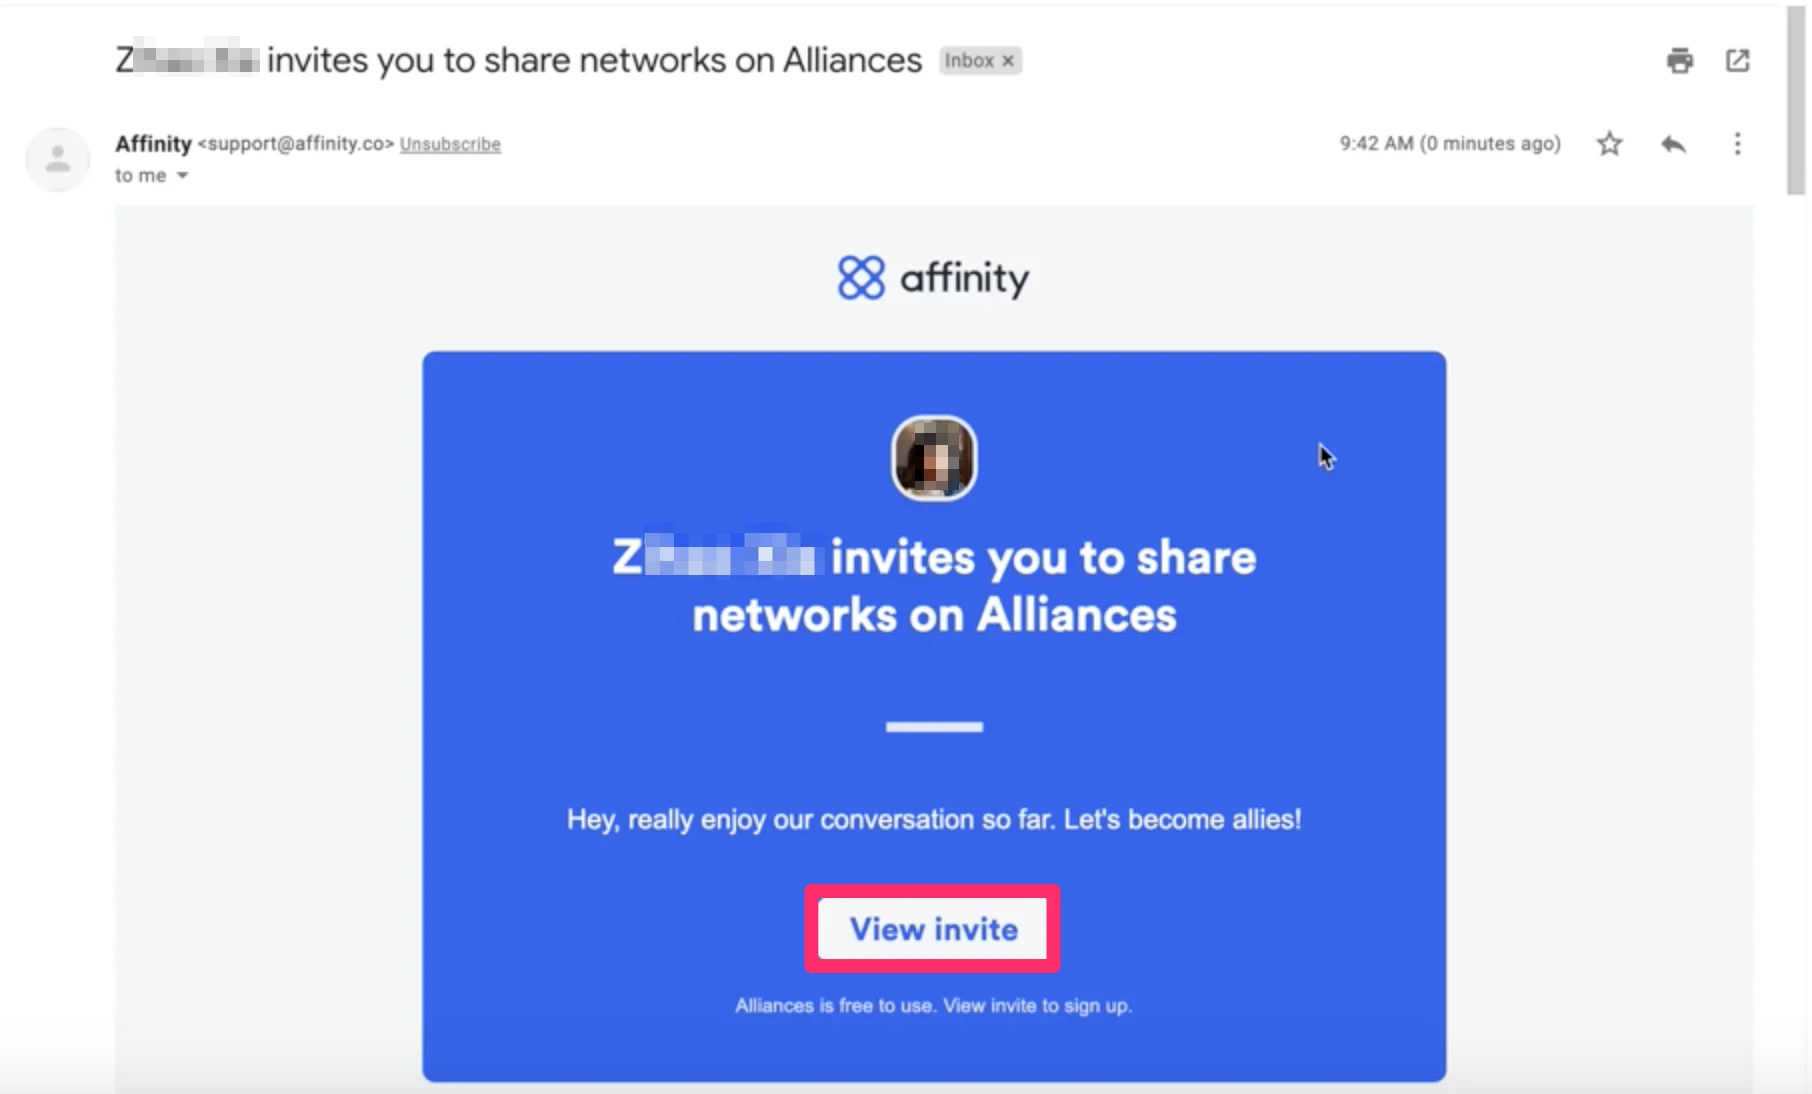
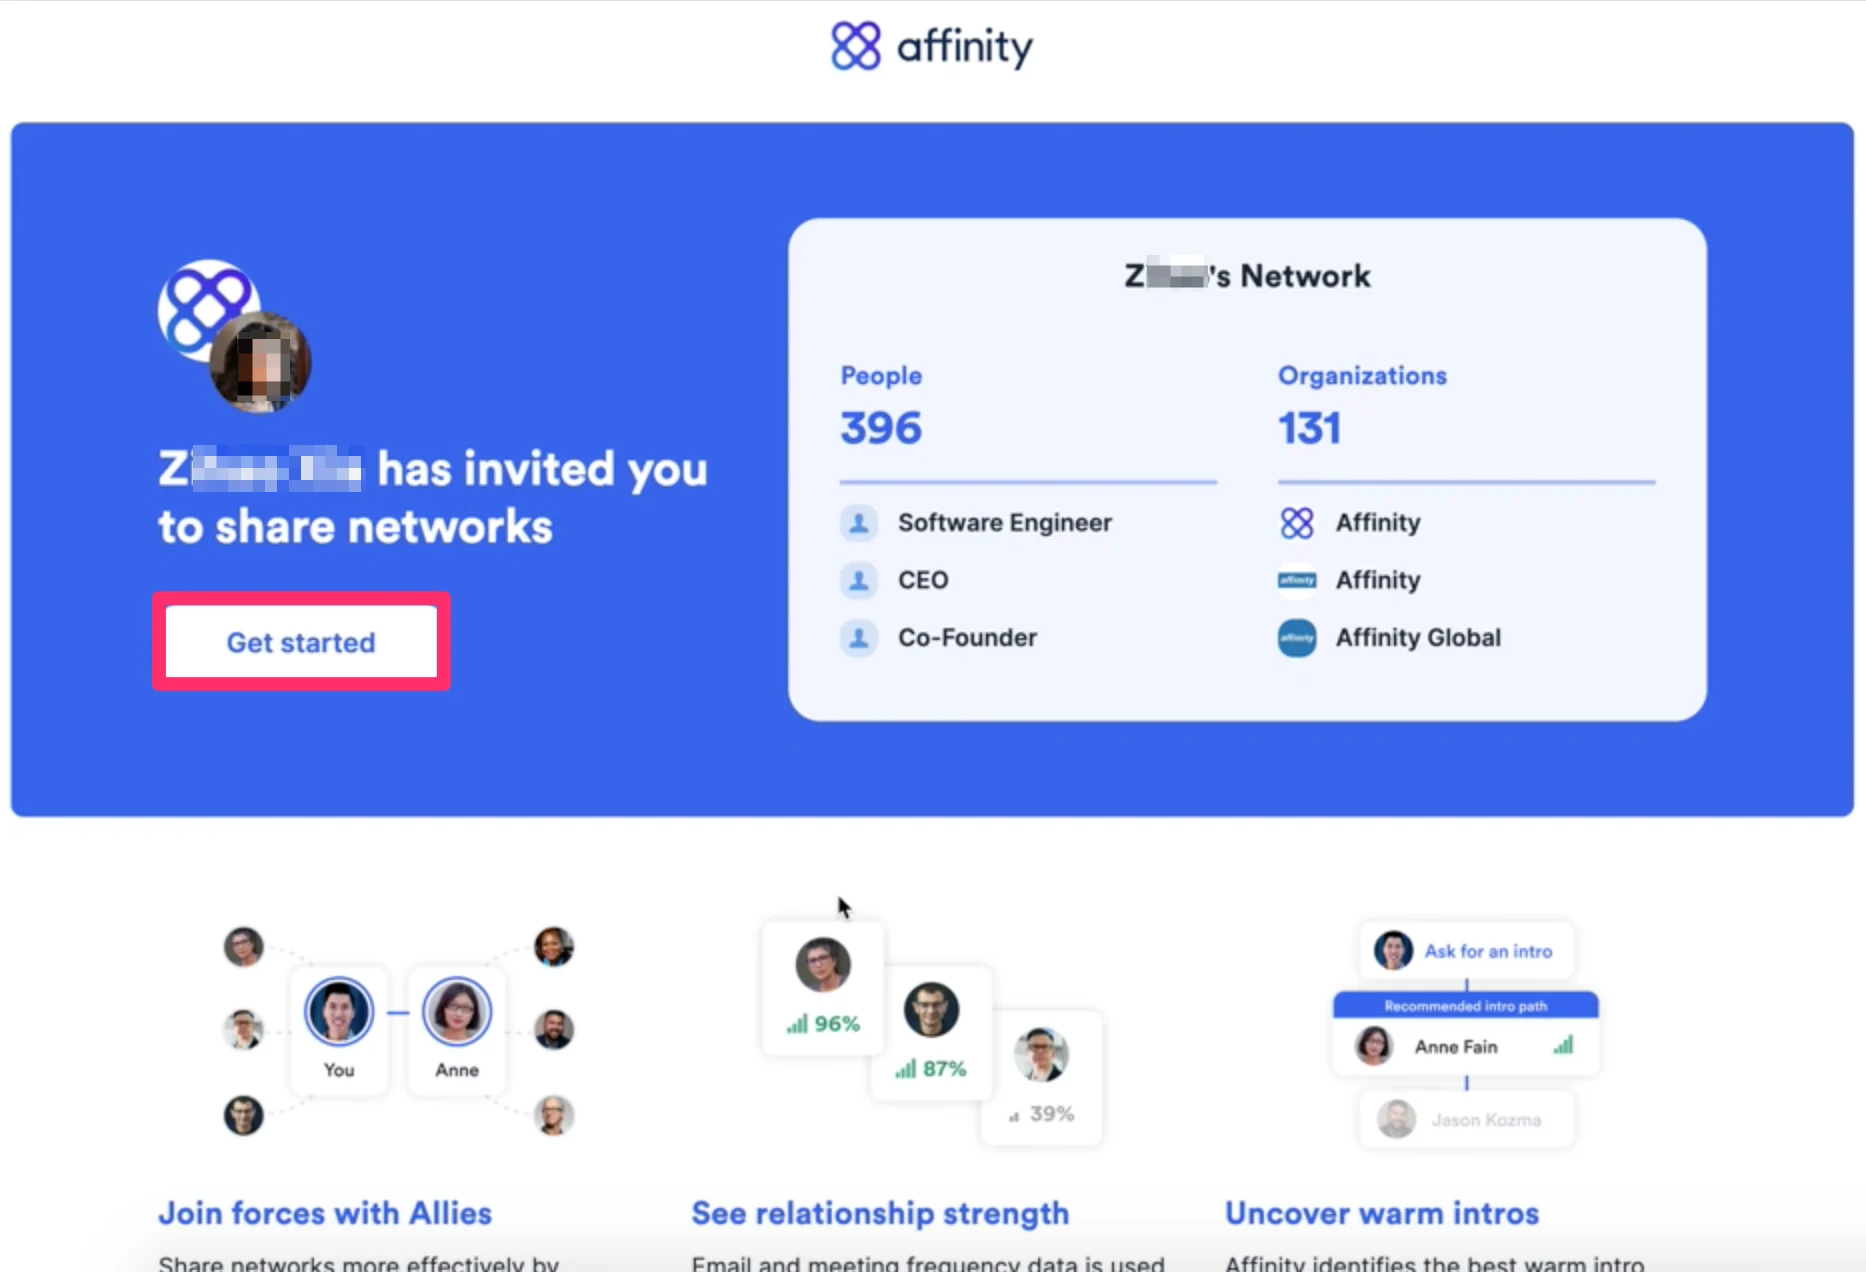
What your potential allies will see
As soon as the invite is sent, your potential allies will receive an email with the following steps.- Click View invite.
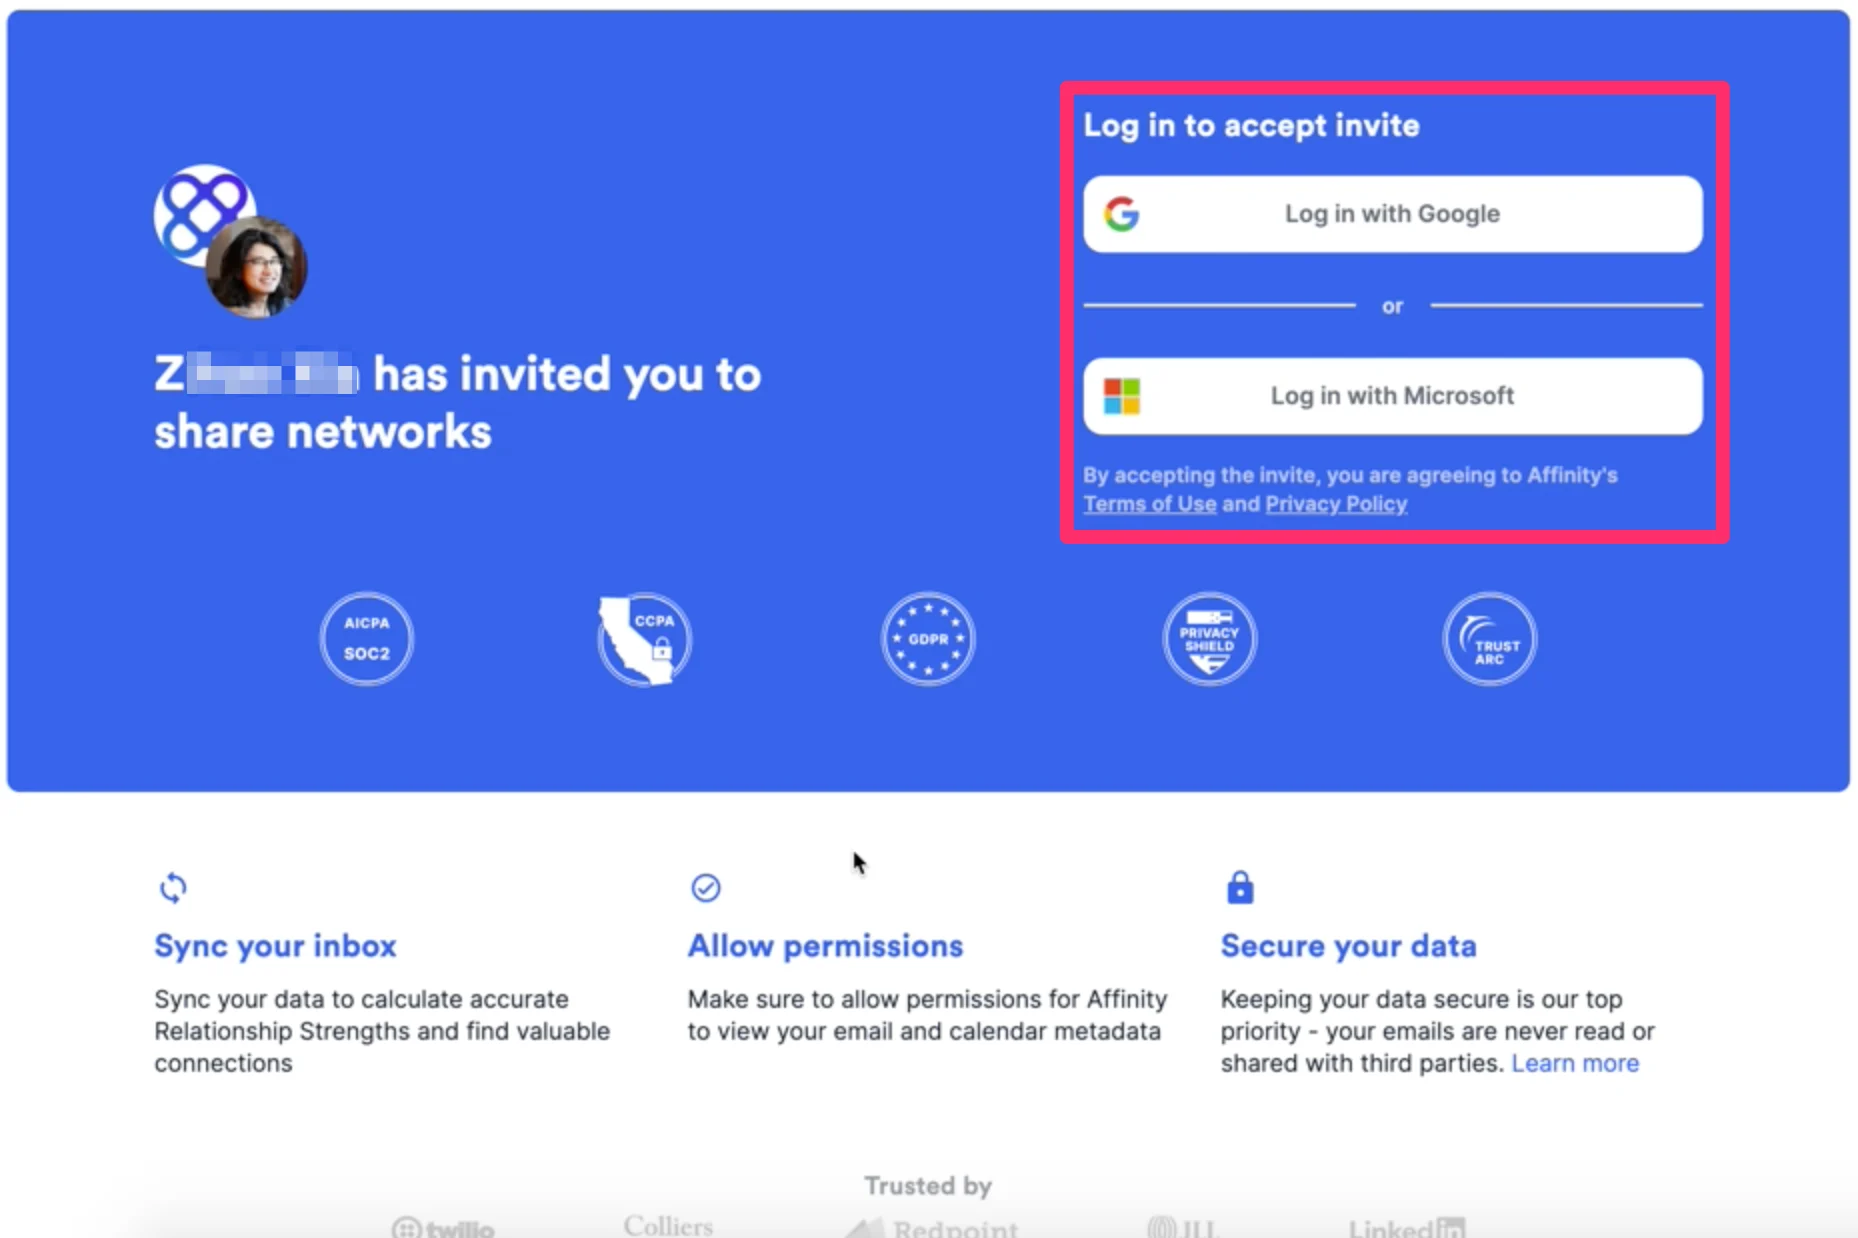
- See the value you’d get by joining Affinity Alliances, then click Get started.
- Login via Google or Microsoft based on which one your email account is running on.
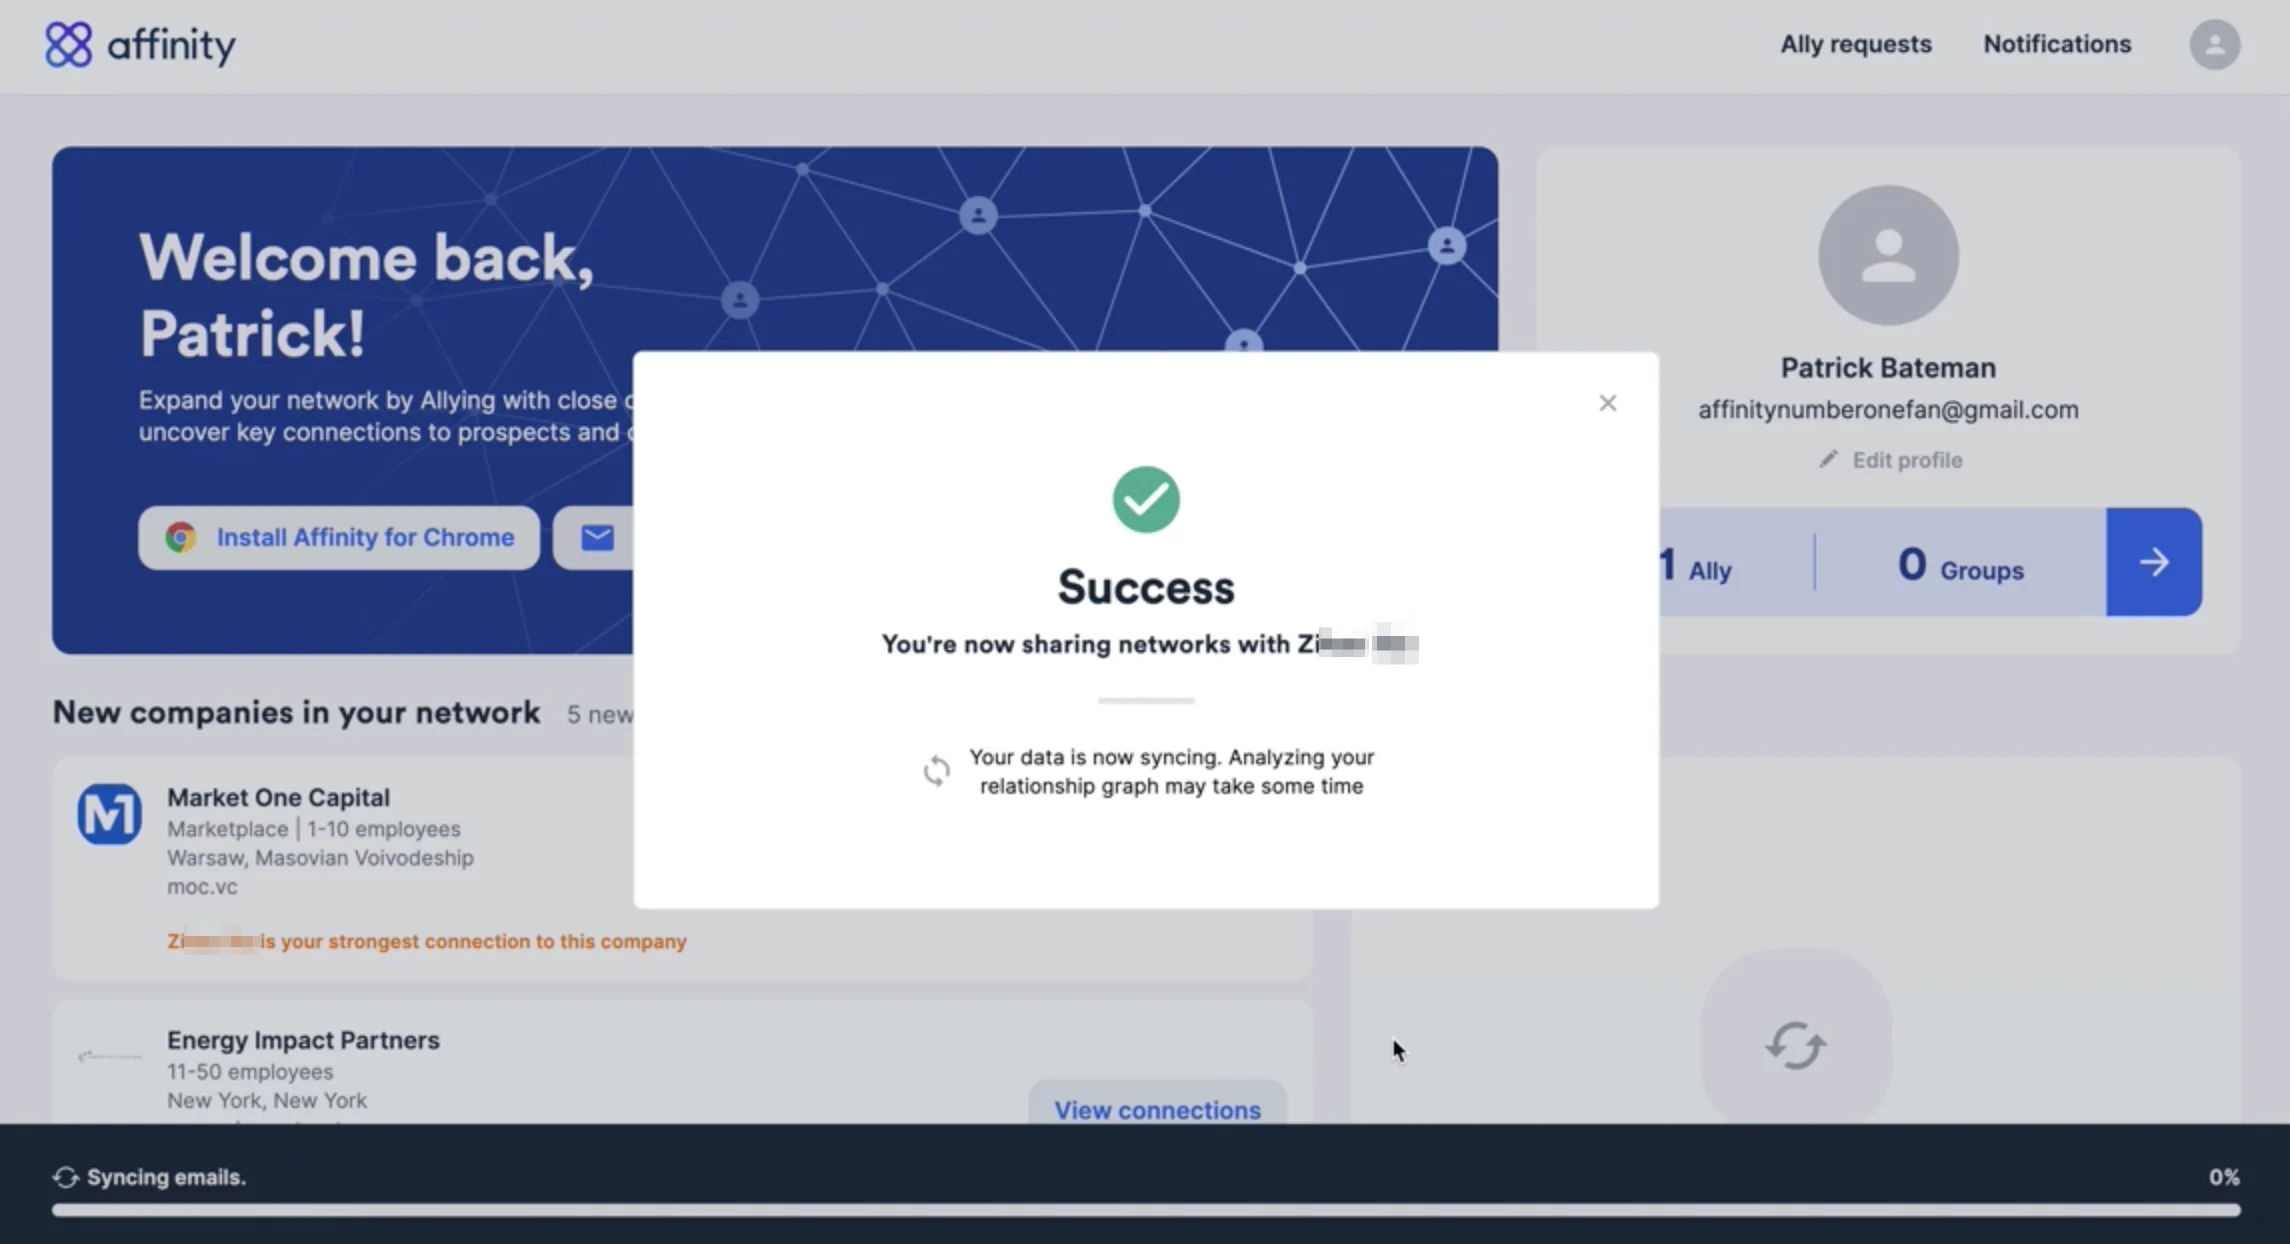
- We’ll start generating your network and your relationship strengths with individuals as we sync your email/calendar data. We will not be sharing your email/calendar data with anyone. Your allies will only be able to see who you know (full name) and how well you know them (relationship strength score between 10-100).
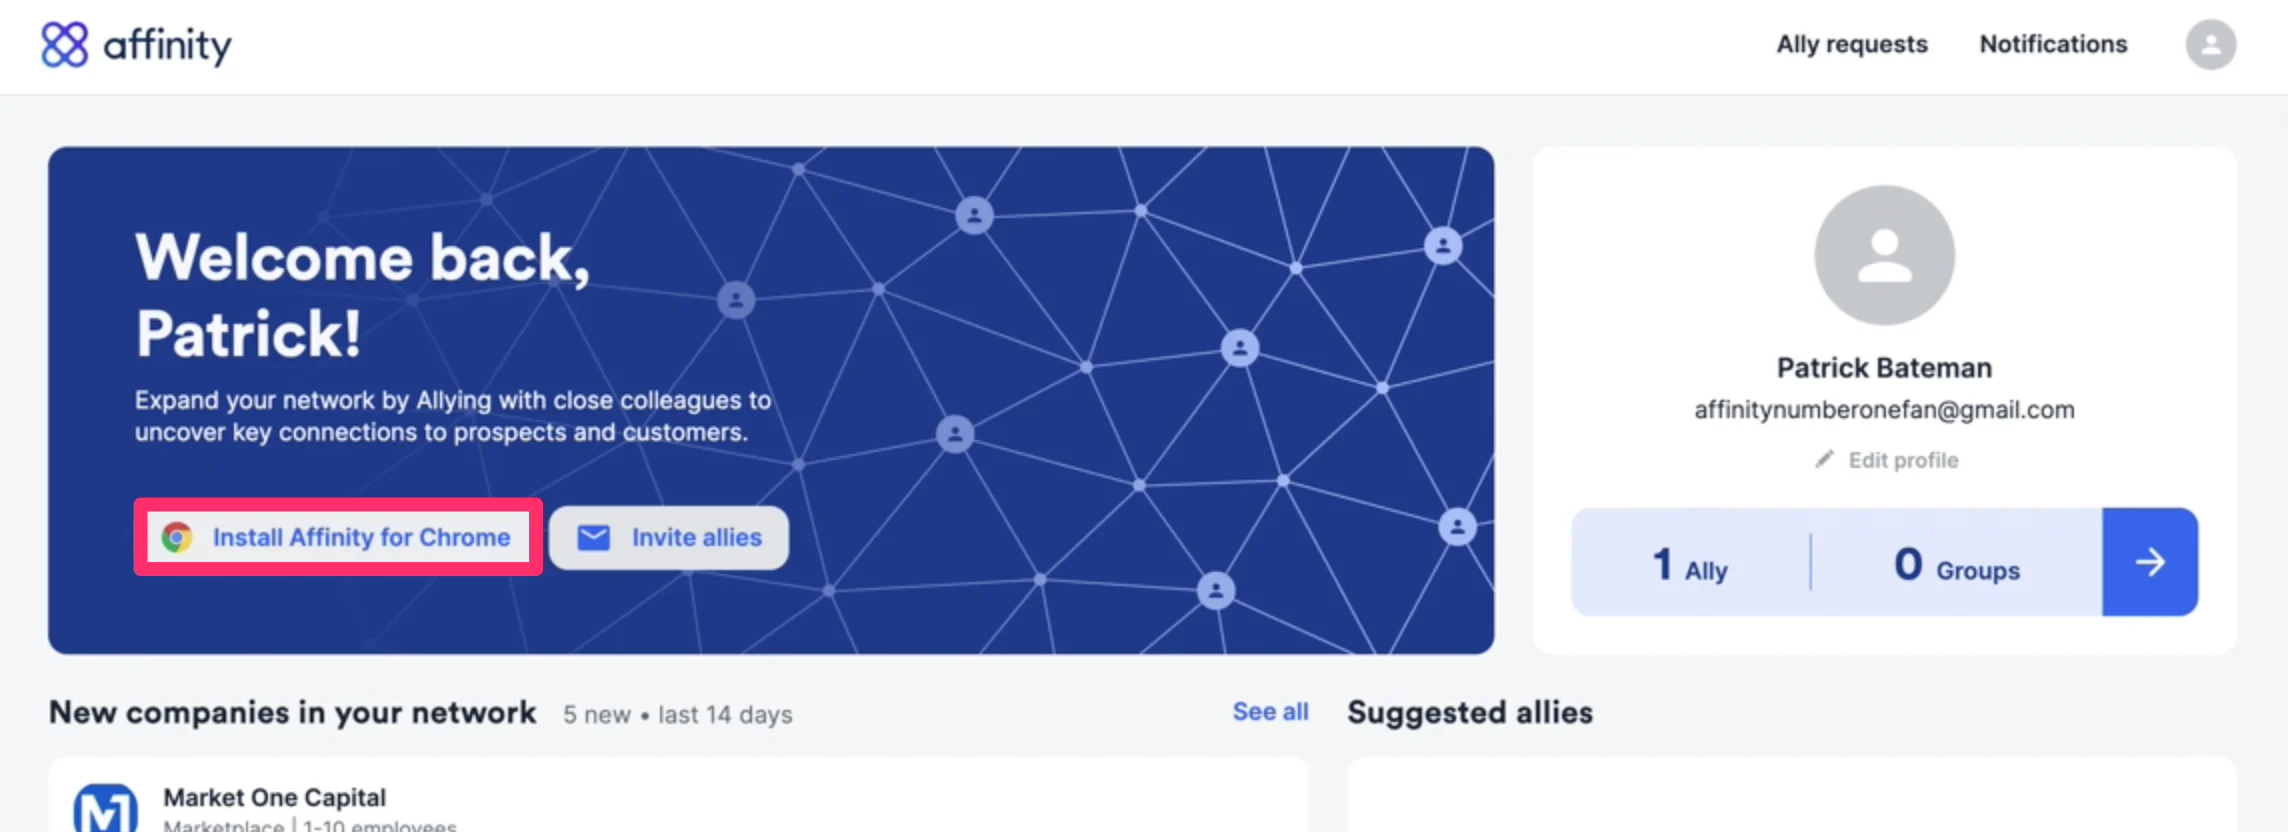
- Now, you can download the Affinity Pathfinder Chrome Extension to surface your Affinity connections on LinkedIn and on any website you visit.
How to access Affinity Alliances moving forward
- If you have your web browser cookies enabled, you can easily access your Affinity Alliances dashboard moving forward by bookmarking https://alliances.affinity.co/home
- If you’ve been signed out and need to sign back in, go to https://www.affinity.co and click Sign in on the top-right corner. Then, sign in with your email credentials.