How-to — task-oriented recipe.
Who can access Affinity’s Outlook Add-in?
Interested in upgrading to Scale, Advanced, or Enterprise? Please reach out to your Affinity point of contact or support@affinity.co.
Prerequisites
- Affinity’s Outlook add-in is only available for Office 365 and Exchange (On-Prem) accounts.
- Affinity’s Outlook add-in is only compatible for Outlook versions after Outlook 2016.
- Affinity’s Outlook add-in is only supported on the following browsers: Google Chrome, Microsoft Edge, and Safari.
How to download Affinity for Outlook Add-in (Web App)
In addition to Microsoft’s article on Outlook add-ins, you can follow the steps below:- If you’re an Affinity CRM user, feel free to skip Step 2 below and move on to Step 3.
- If you’re an Affinity for Salesforce user, please make sure your Salesforce Admin selects which users are allowed access to the Affinity for Outlook add-in (see the section titled “How to assign the Affinity permission set to users” in the article How to install/update Affinity’s Managed Package in Salesforce).
- Now, make sure to sign in to your Outlook account that has specific access to your Affinity instance. Open any email, then click the ellipsis (3-dotted icon). Click Get Add-ins.

- Search for Affinity for Outlook.
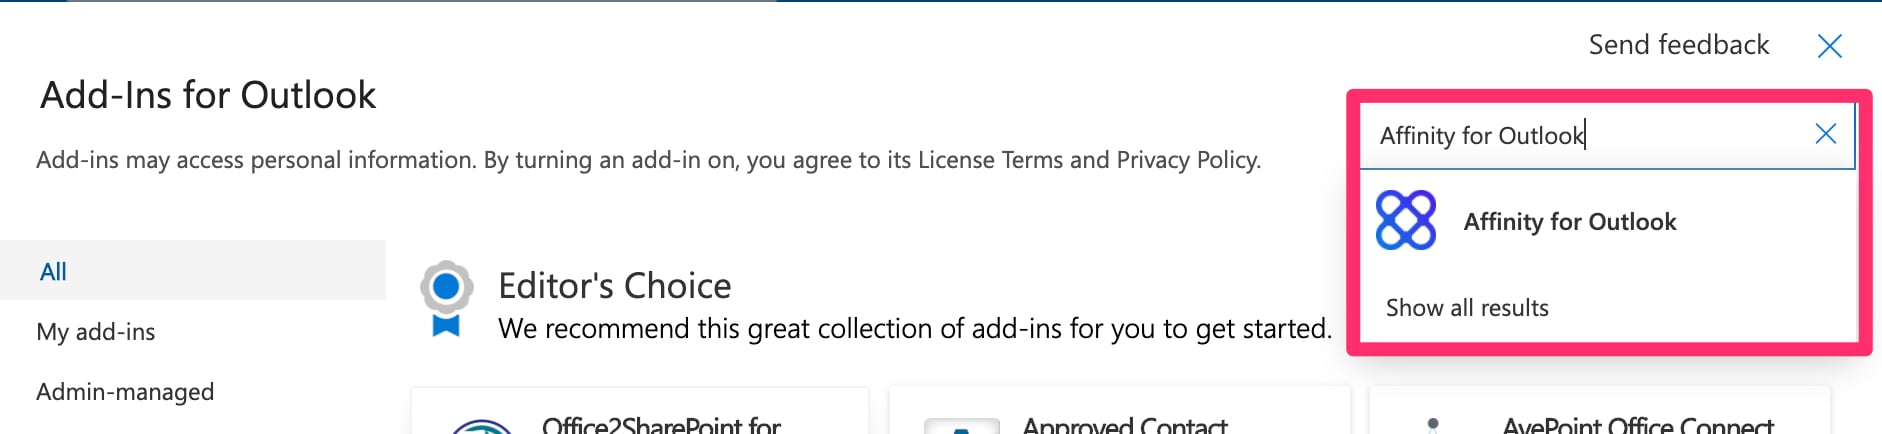
- Click Add.

- Click open any email, then click the 3 dots to see Affinity for Outlook appear.

- Once you’ve successfully downloaded the add-in, check out one of the following based on whether you’re using the Affinity CRM or Affinity for Salesforce:
How to download Affinity for Outlook Add-in (Desktop App)
In addition to Microsoft’s article on Outlook add-ins, you can follow the steps below:- If you’re an Affinity CRM user, feel free to skip Step 2 below and move on to Step 3.
- If you’re an Affinity for Salesforce user, please make sure your Salesforce Admin selects which users are allowed access to the Affinity for Outlook add-in (see the section titled “How to assign the Affinity permission set to users” in the article How to install/update Affinity’s Managed Package in Salesforce).
- Now, open your Outlook desktop application to access your add-ins:
- Windows users: Click the Files tab at the very top of your screen, then click Manage Add-ins.
- Mac users: Click the Tools tab at the very top of your screen, then click Get Add-ins.

- Search for Affinity for Outlook, then download the add-in.

- Once you’ve successfully downloaded the add-in, check out one of the following based on whether you’re using the Affinity CRM or Affinity for Salesforce:
Troubleshooting Common Issues
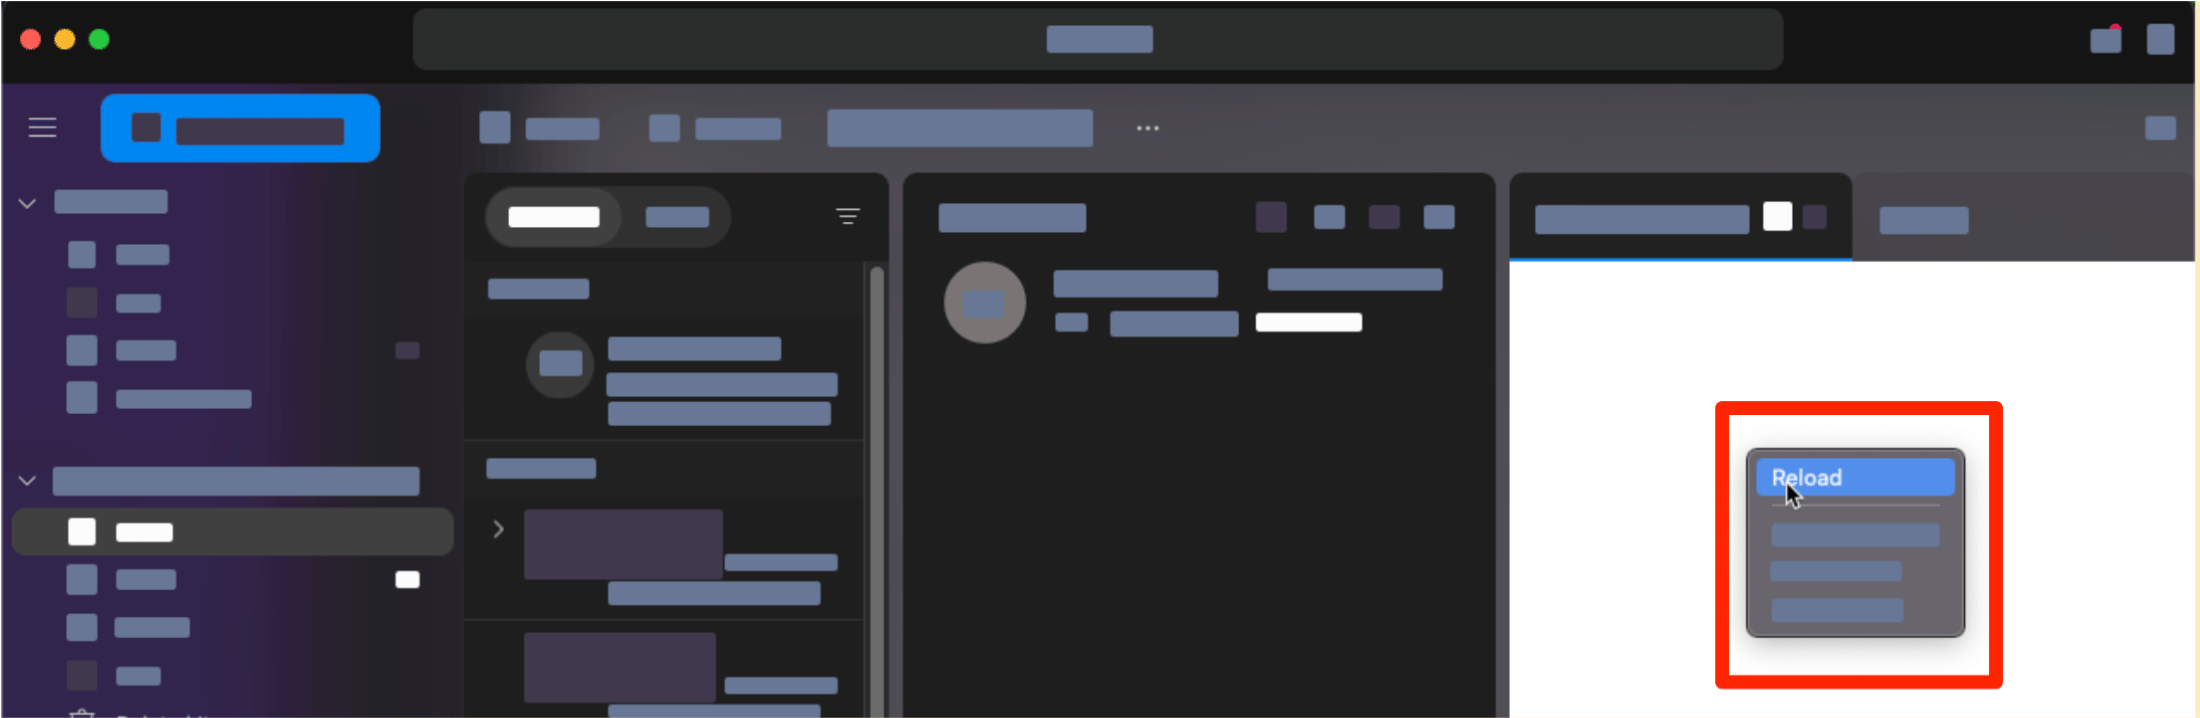
Problem: Blank Screen? Clear your cache
If met with a blank screen (see example below), you will need to empty your cache and perform a hard reload of the application. The reload will help to retrieve the latest version of the Outlook add-in.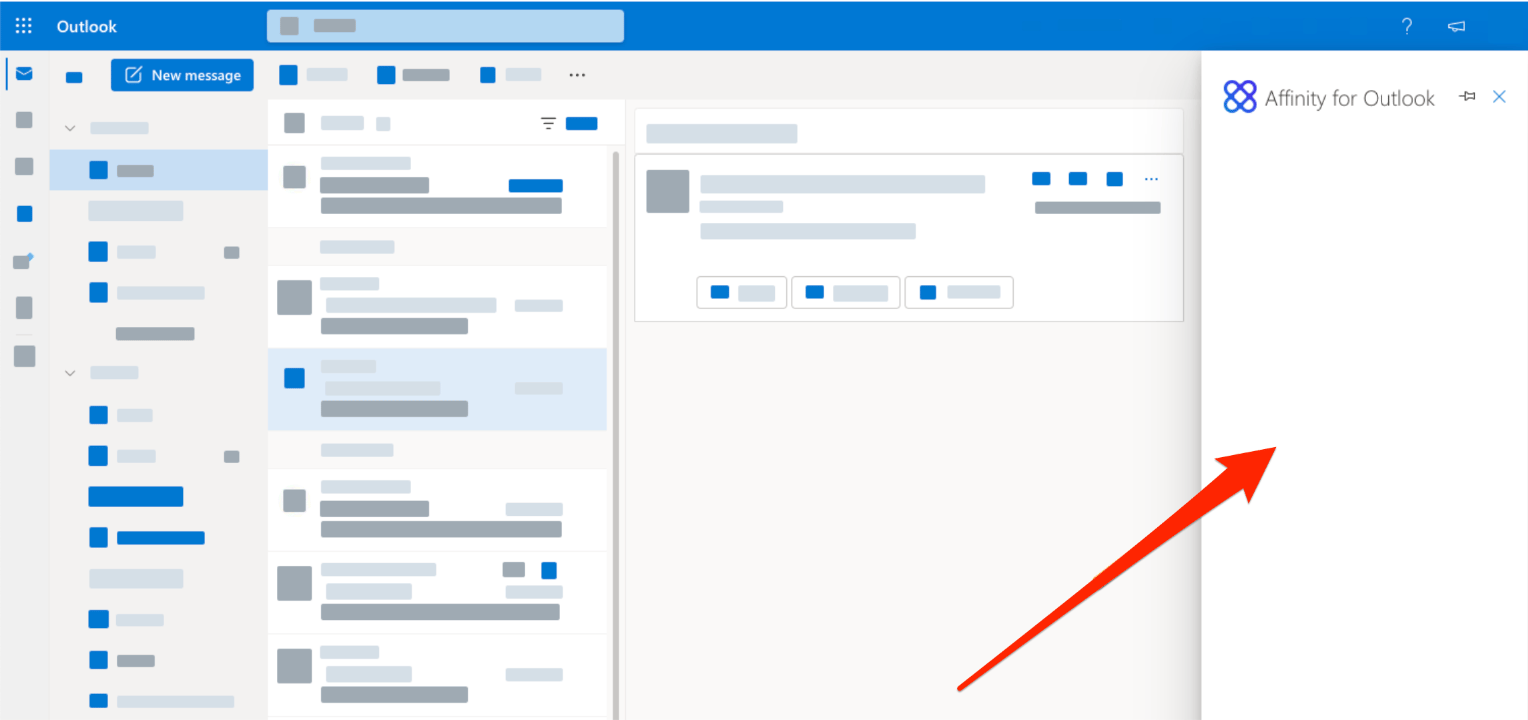
Web App — Clearing your cache
Google Chrome- Windows users — Press Ctrl + F5 on your keyboard.
- Mac users — Press Cmd + Shift + R on your keyboard.
- Windows users — Press Ctrl + F5 on your keyboard.
- Mac users — Press Cmd + Shift + R on your keyboard.
- Click Safari on the top navigation bar, then click Empty Cache, or press Opt + Cmd + E.
- To refresh, click the Refresh button on the address bar or press Cmd + R.
- Press Ctrl + F5 on your keyboard.
Desktop App — Clearing your cache
Outlook Desktop for Mac- Open Affinity for Outlook add-in.
- Right click the side panel.
- Select Reload.
- Open the Affinity for Outlook add-in.
- Right click the side panel.
- Select Refresh.

Problem: Missing or Disabled add-in icon?
Web App — Checking your cookie settings
- On the top-right corner of your web browser, click the ellipsis (3-dotted icon), then click Settings.

- Click Privacy and security, then click Cookies and other site data.

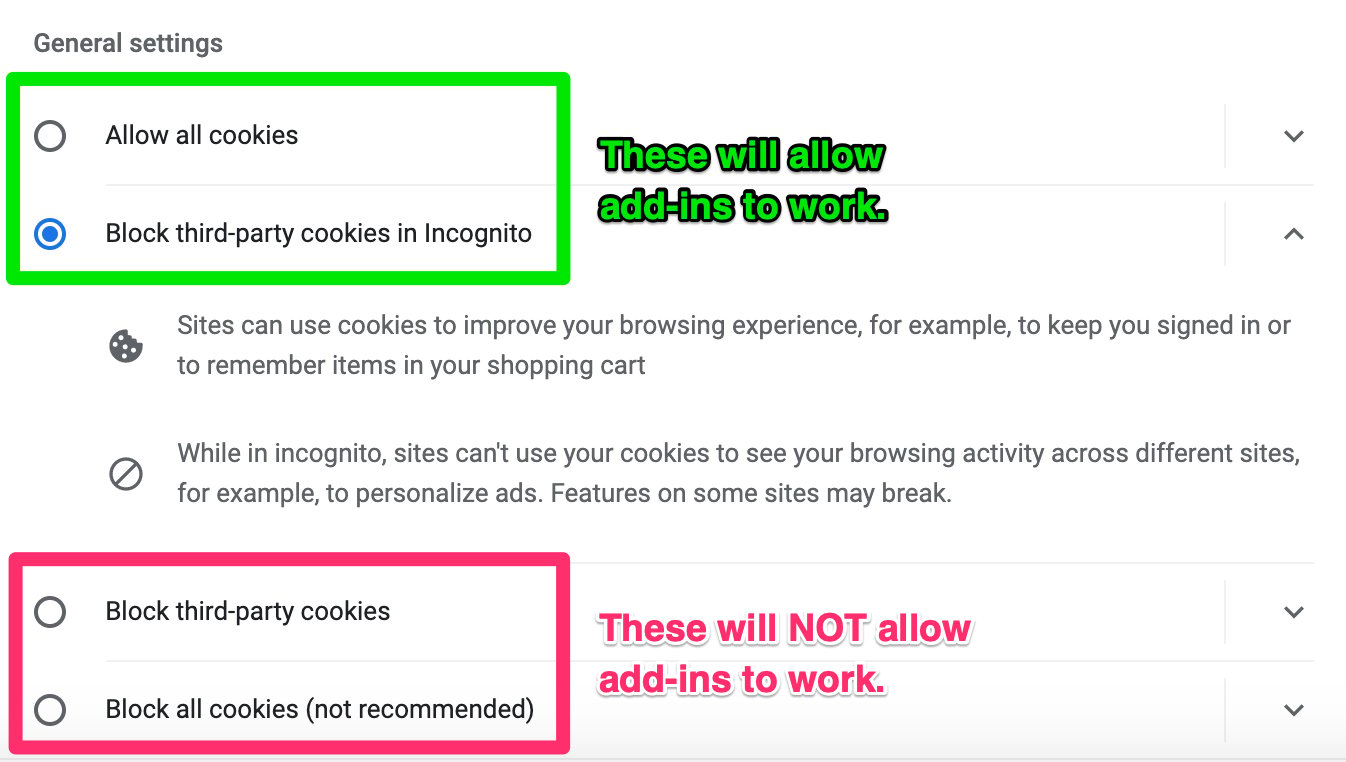
- Make sure your cookie settings are either Allow all cookies or Block third-party cookies in Incognito. If they are set to Block third-party cookies or Block all cookies (not recommended), then Affinity’s Outlook add-in will not work.
Desktop App — Missing or Disabled Add-in icon (for Windows/PC)
- Click File to open additional options.

- Select Office Account, and select Manage Settings.

- Check the box for Enable optional connected experiences, then click OK and restart Outlook.

- If you still do not see the add-in appear after restarting, open your Office Options menu and go to File > Options.

- Select Customize Ribbon (1), then select All Commands (2). Then, click Add-ins (3) and click Add>> (4) to add the Add-ins icon to your Ribbon (menu bar).

- Click OK to save your changes.
Desktop App — Missing or Disabled Add-in icon (for Mac)
- Click Outlook on the top left corner, then click Preferences.

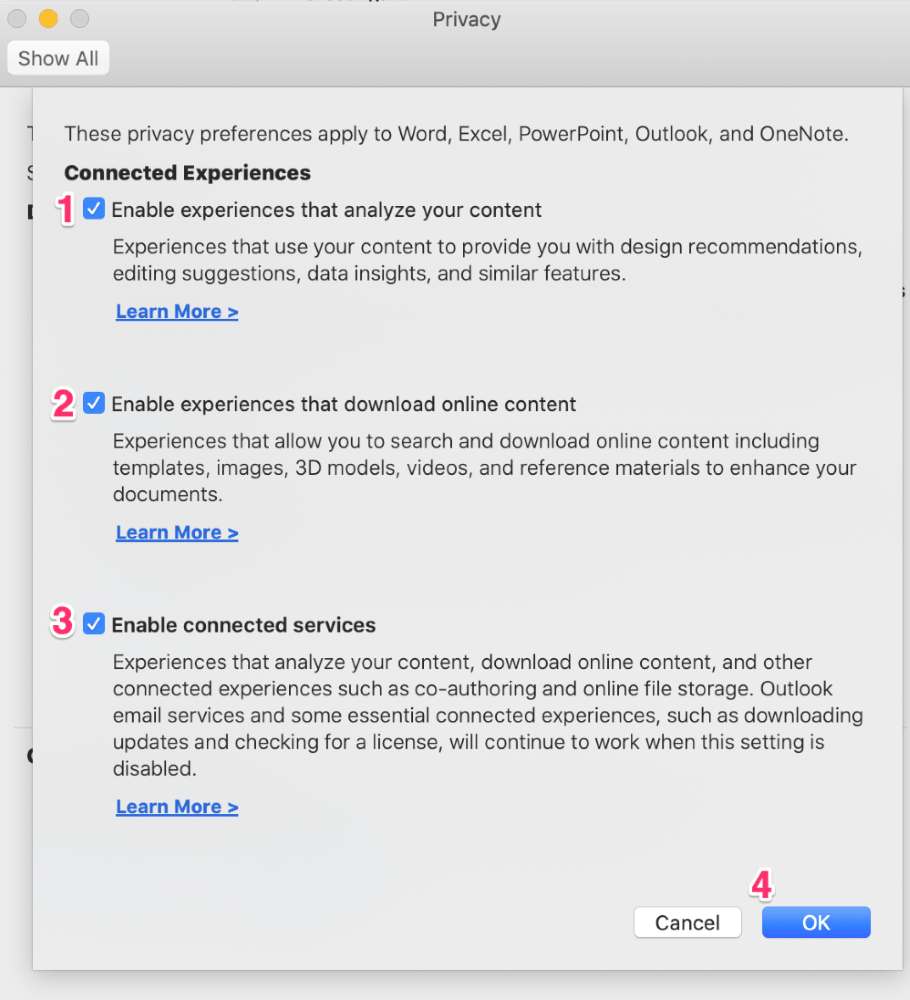
- Click on Privacy.

- Click Manage Connected Experiences.

- Ensure all checkboxes are enabled, then click OK. You may need to restart Outlook to apply these changes.