How-to — task-oriented recipe.
- Note: Custom SSO is only available for those on our Enterprise tier.
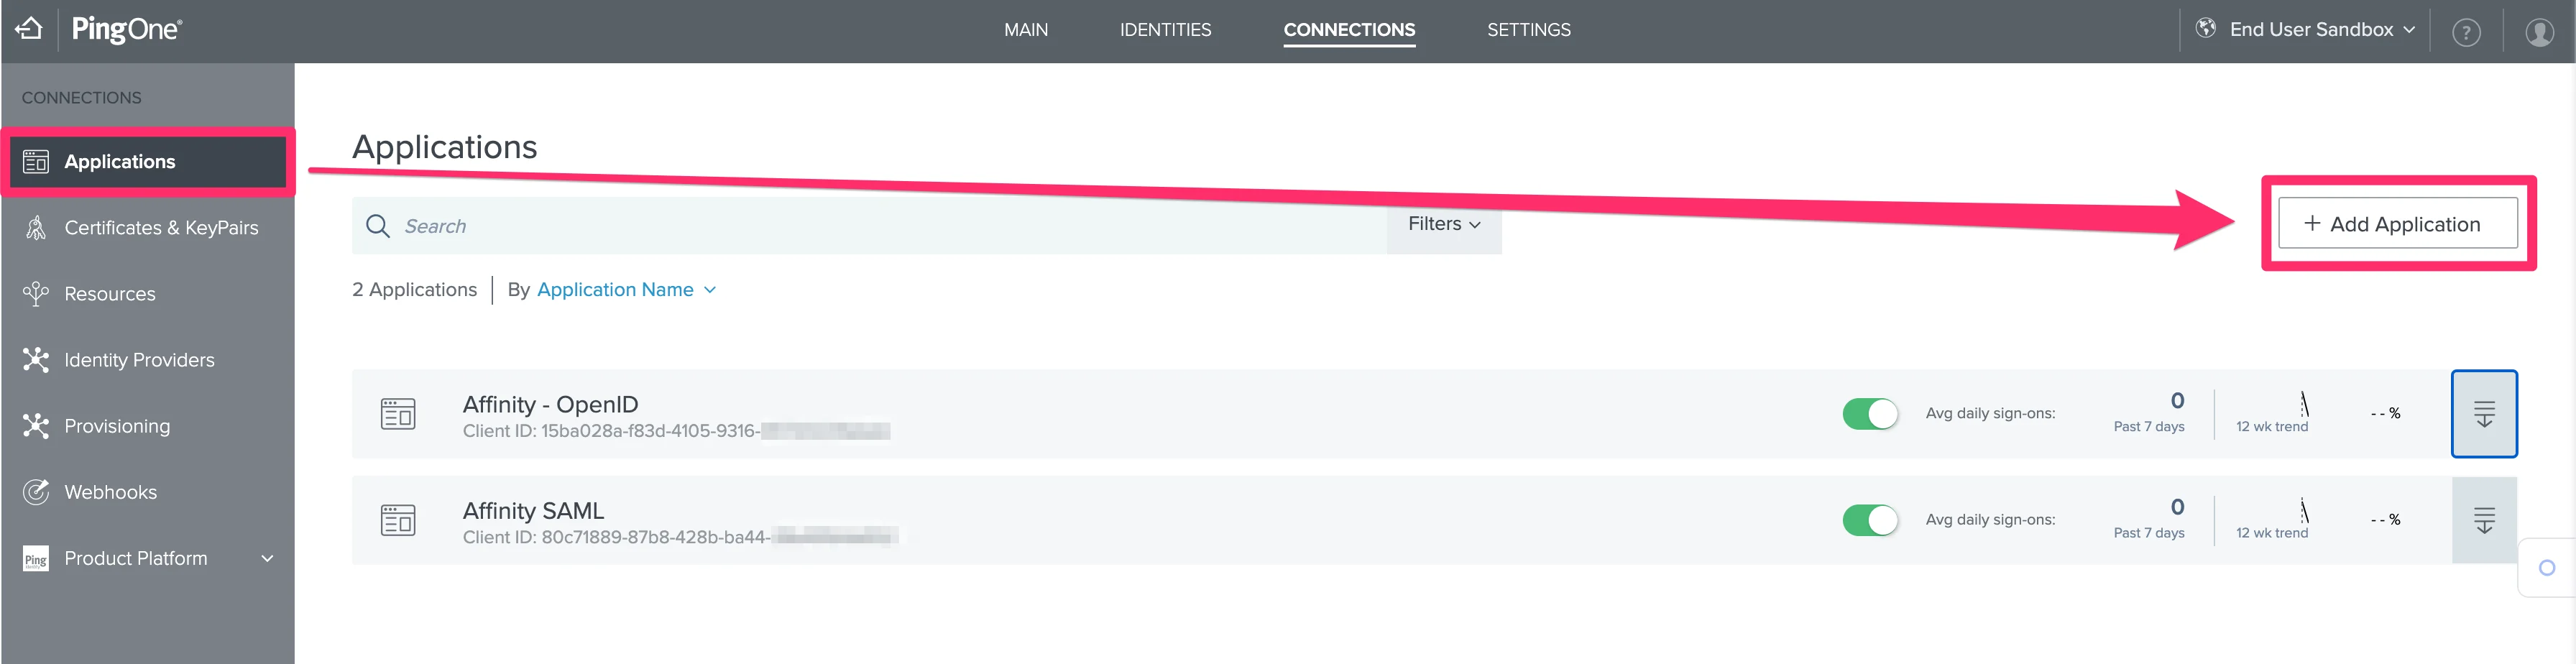
- Click Applications on the left side, then click the + Add Application button on the right.
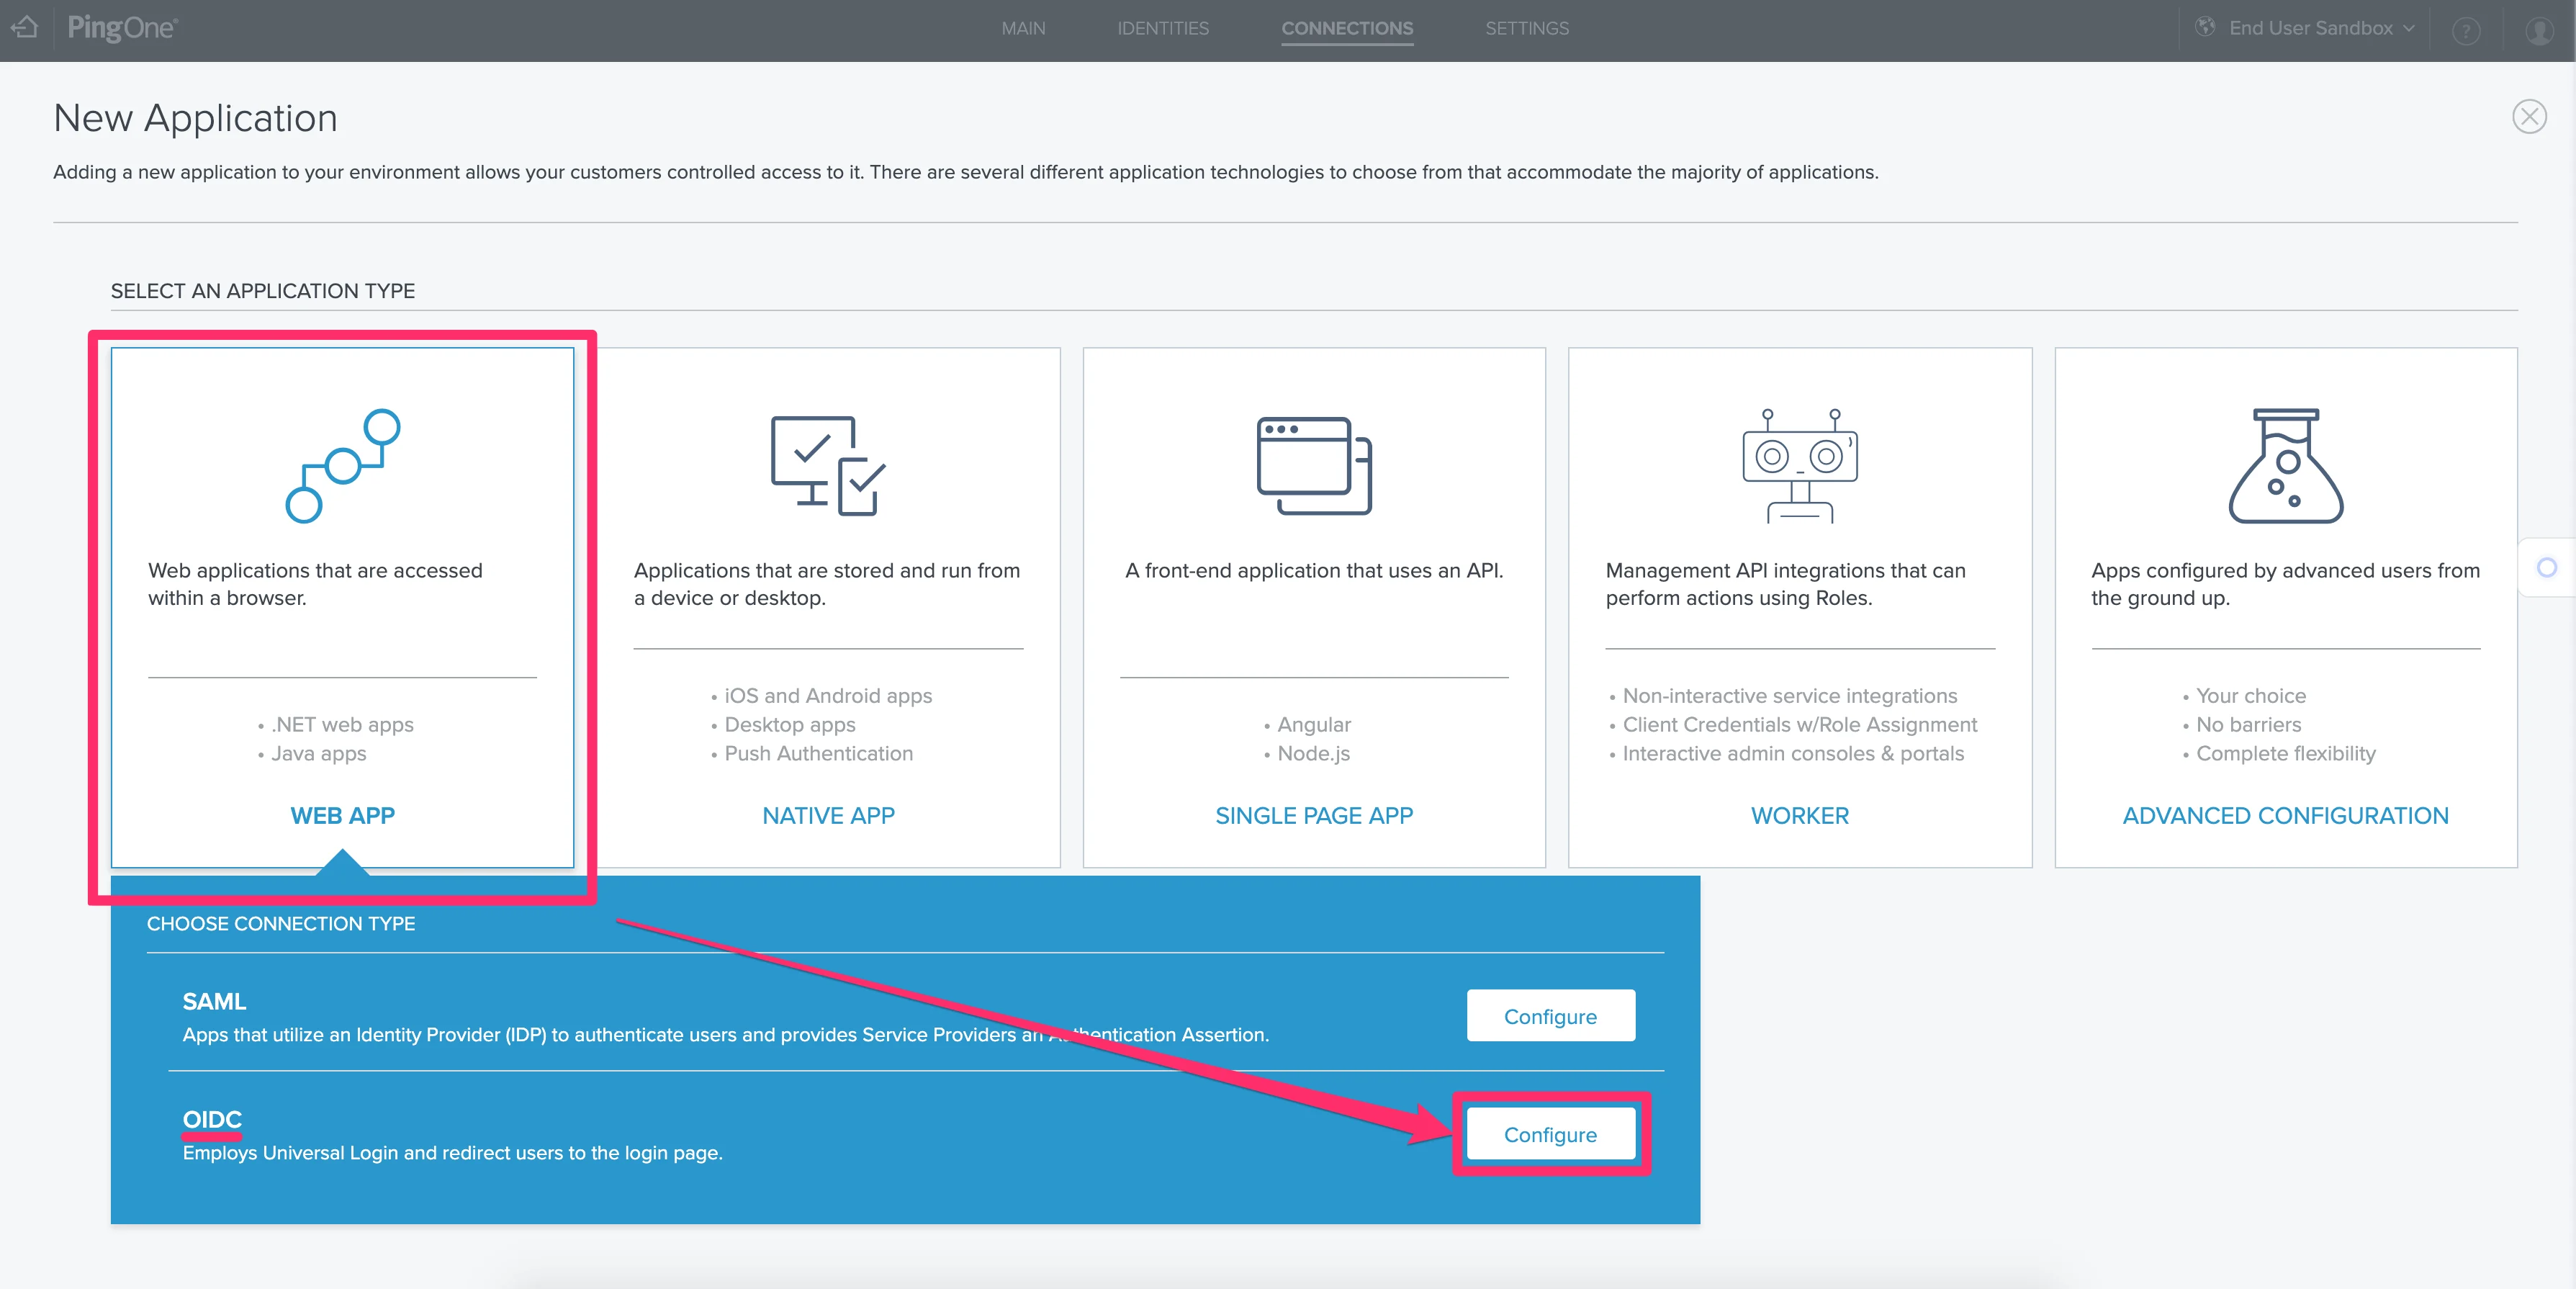
- Then, select Web App and click Configure next to the OIDC option.
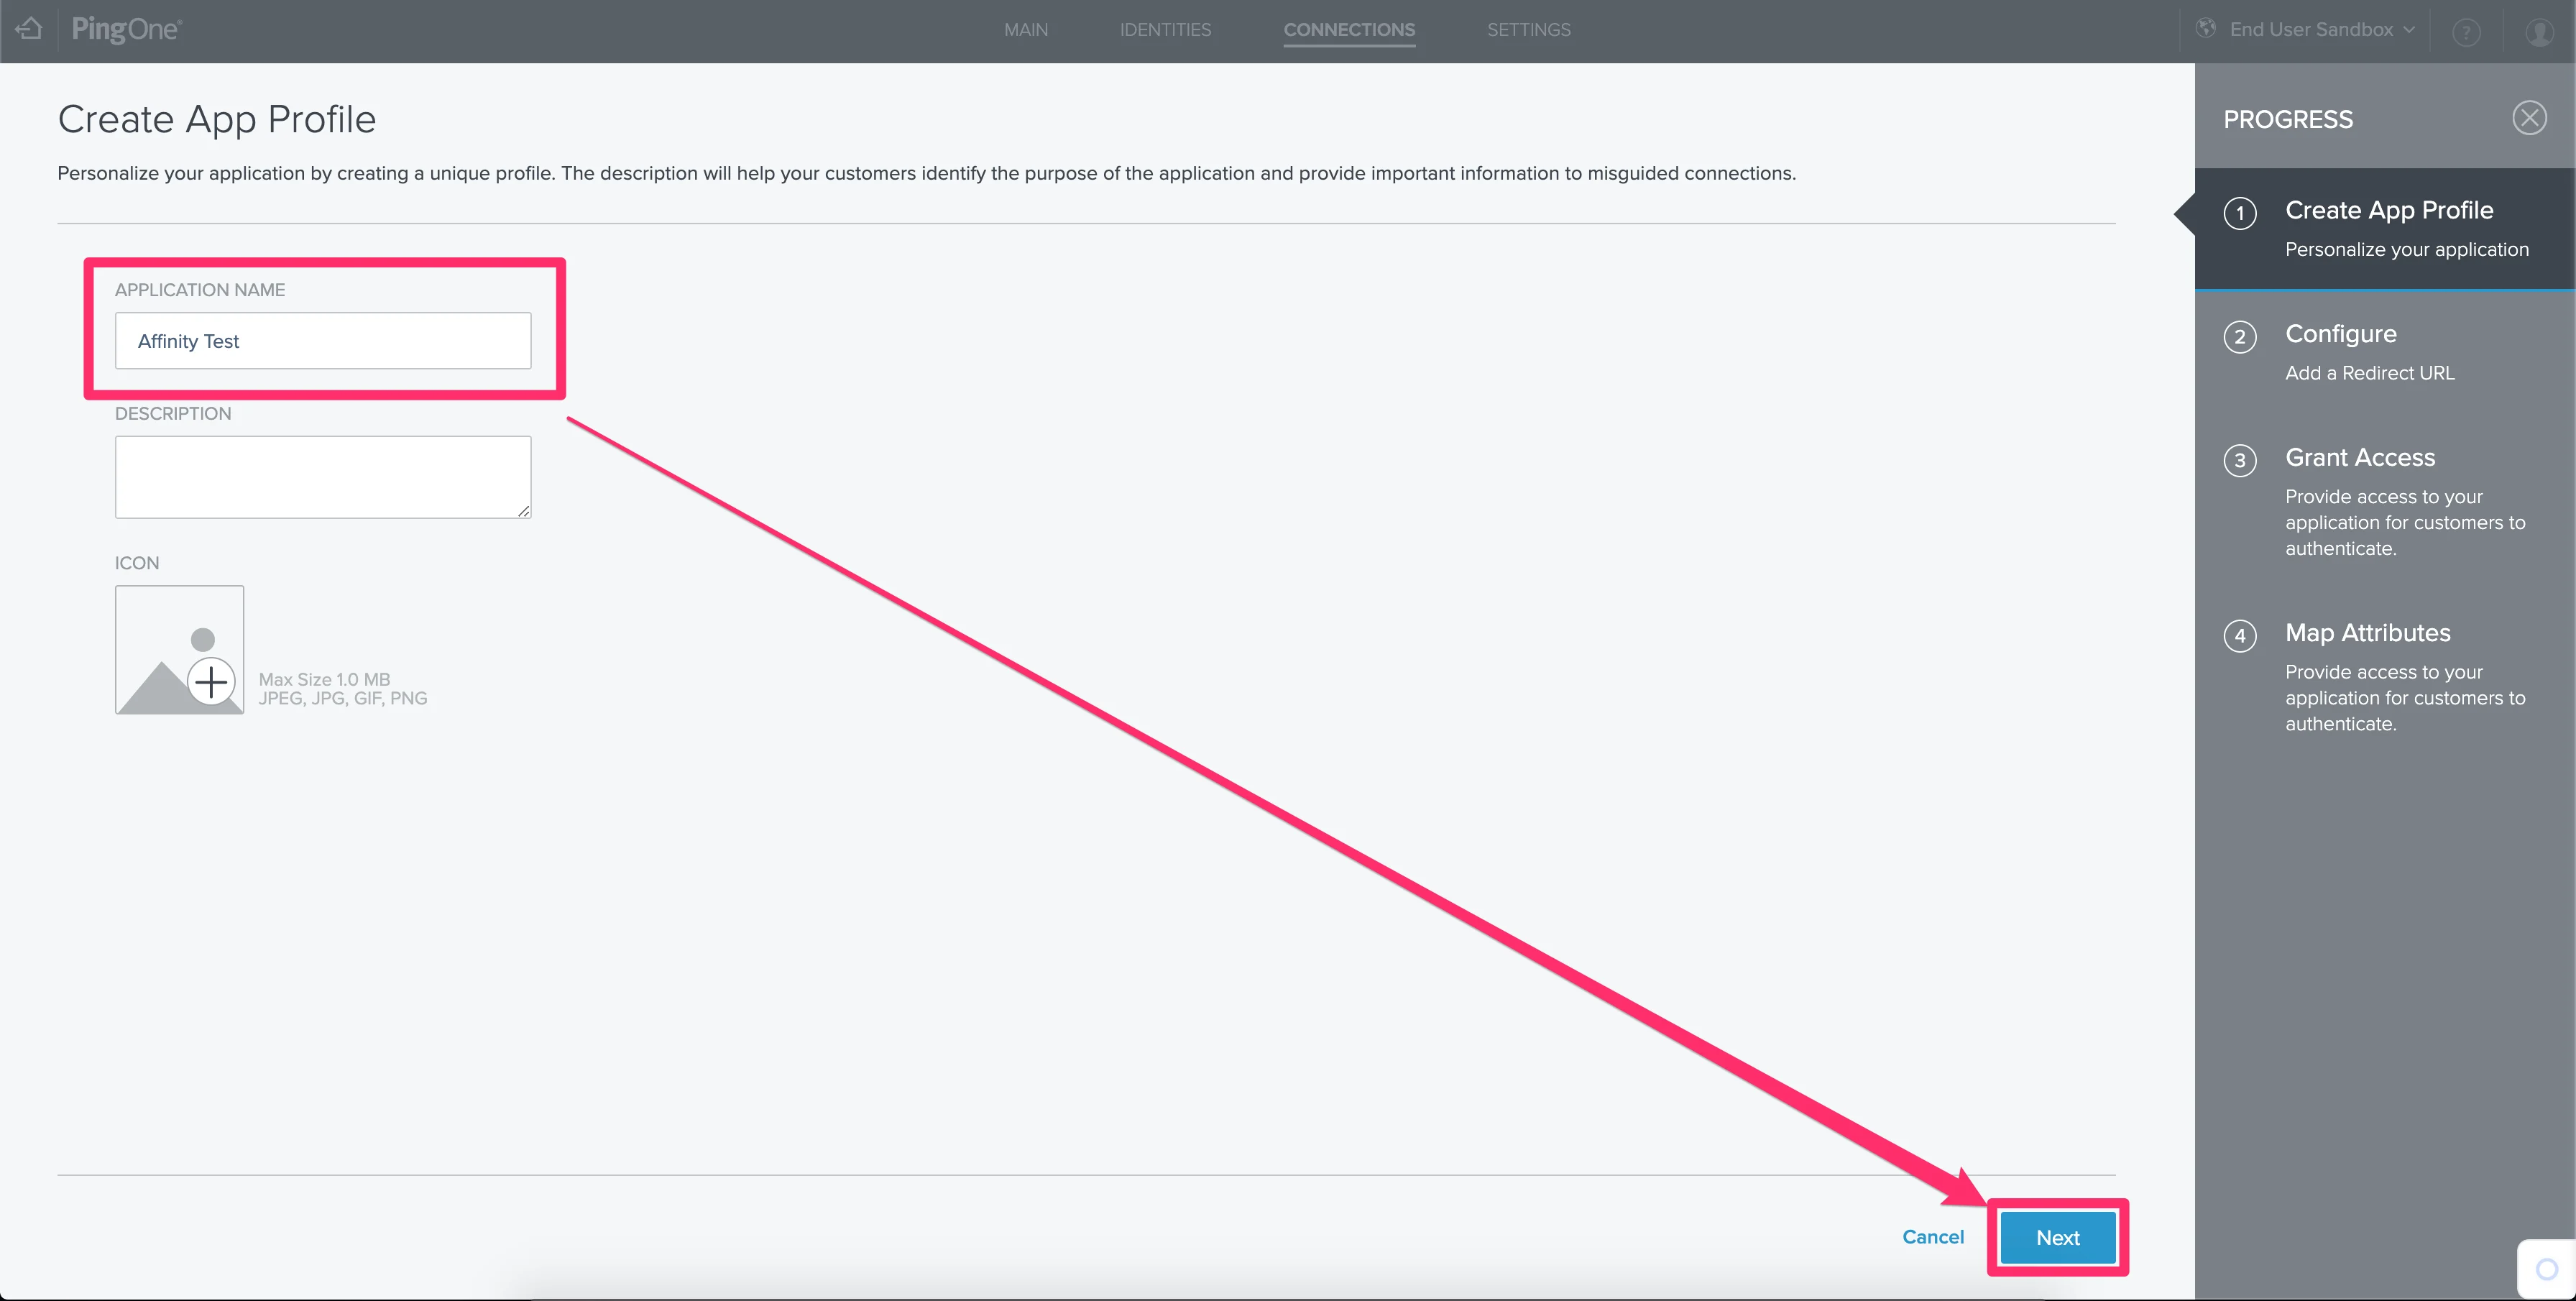
- On the next screen, add the Application Name. The rest of the fields are optional.
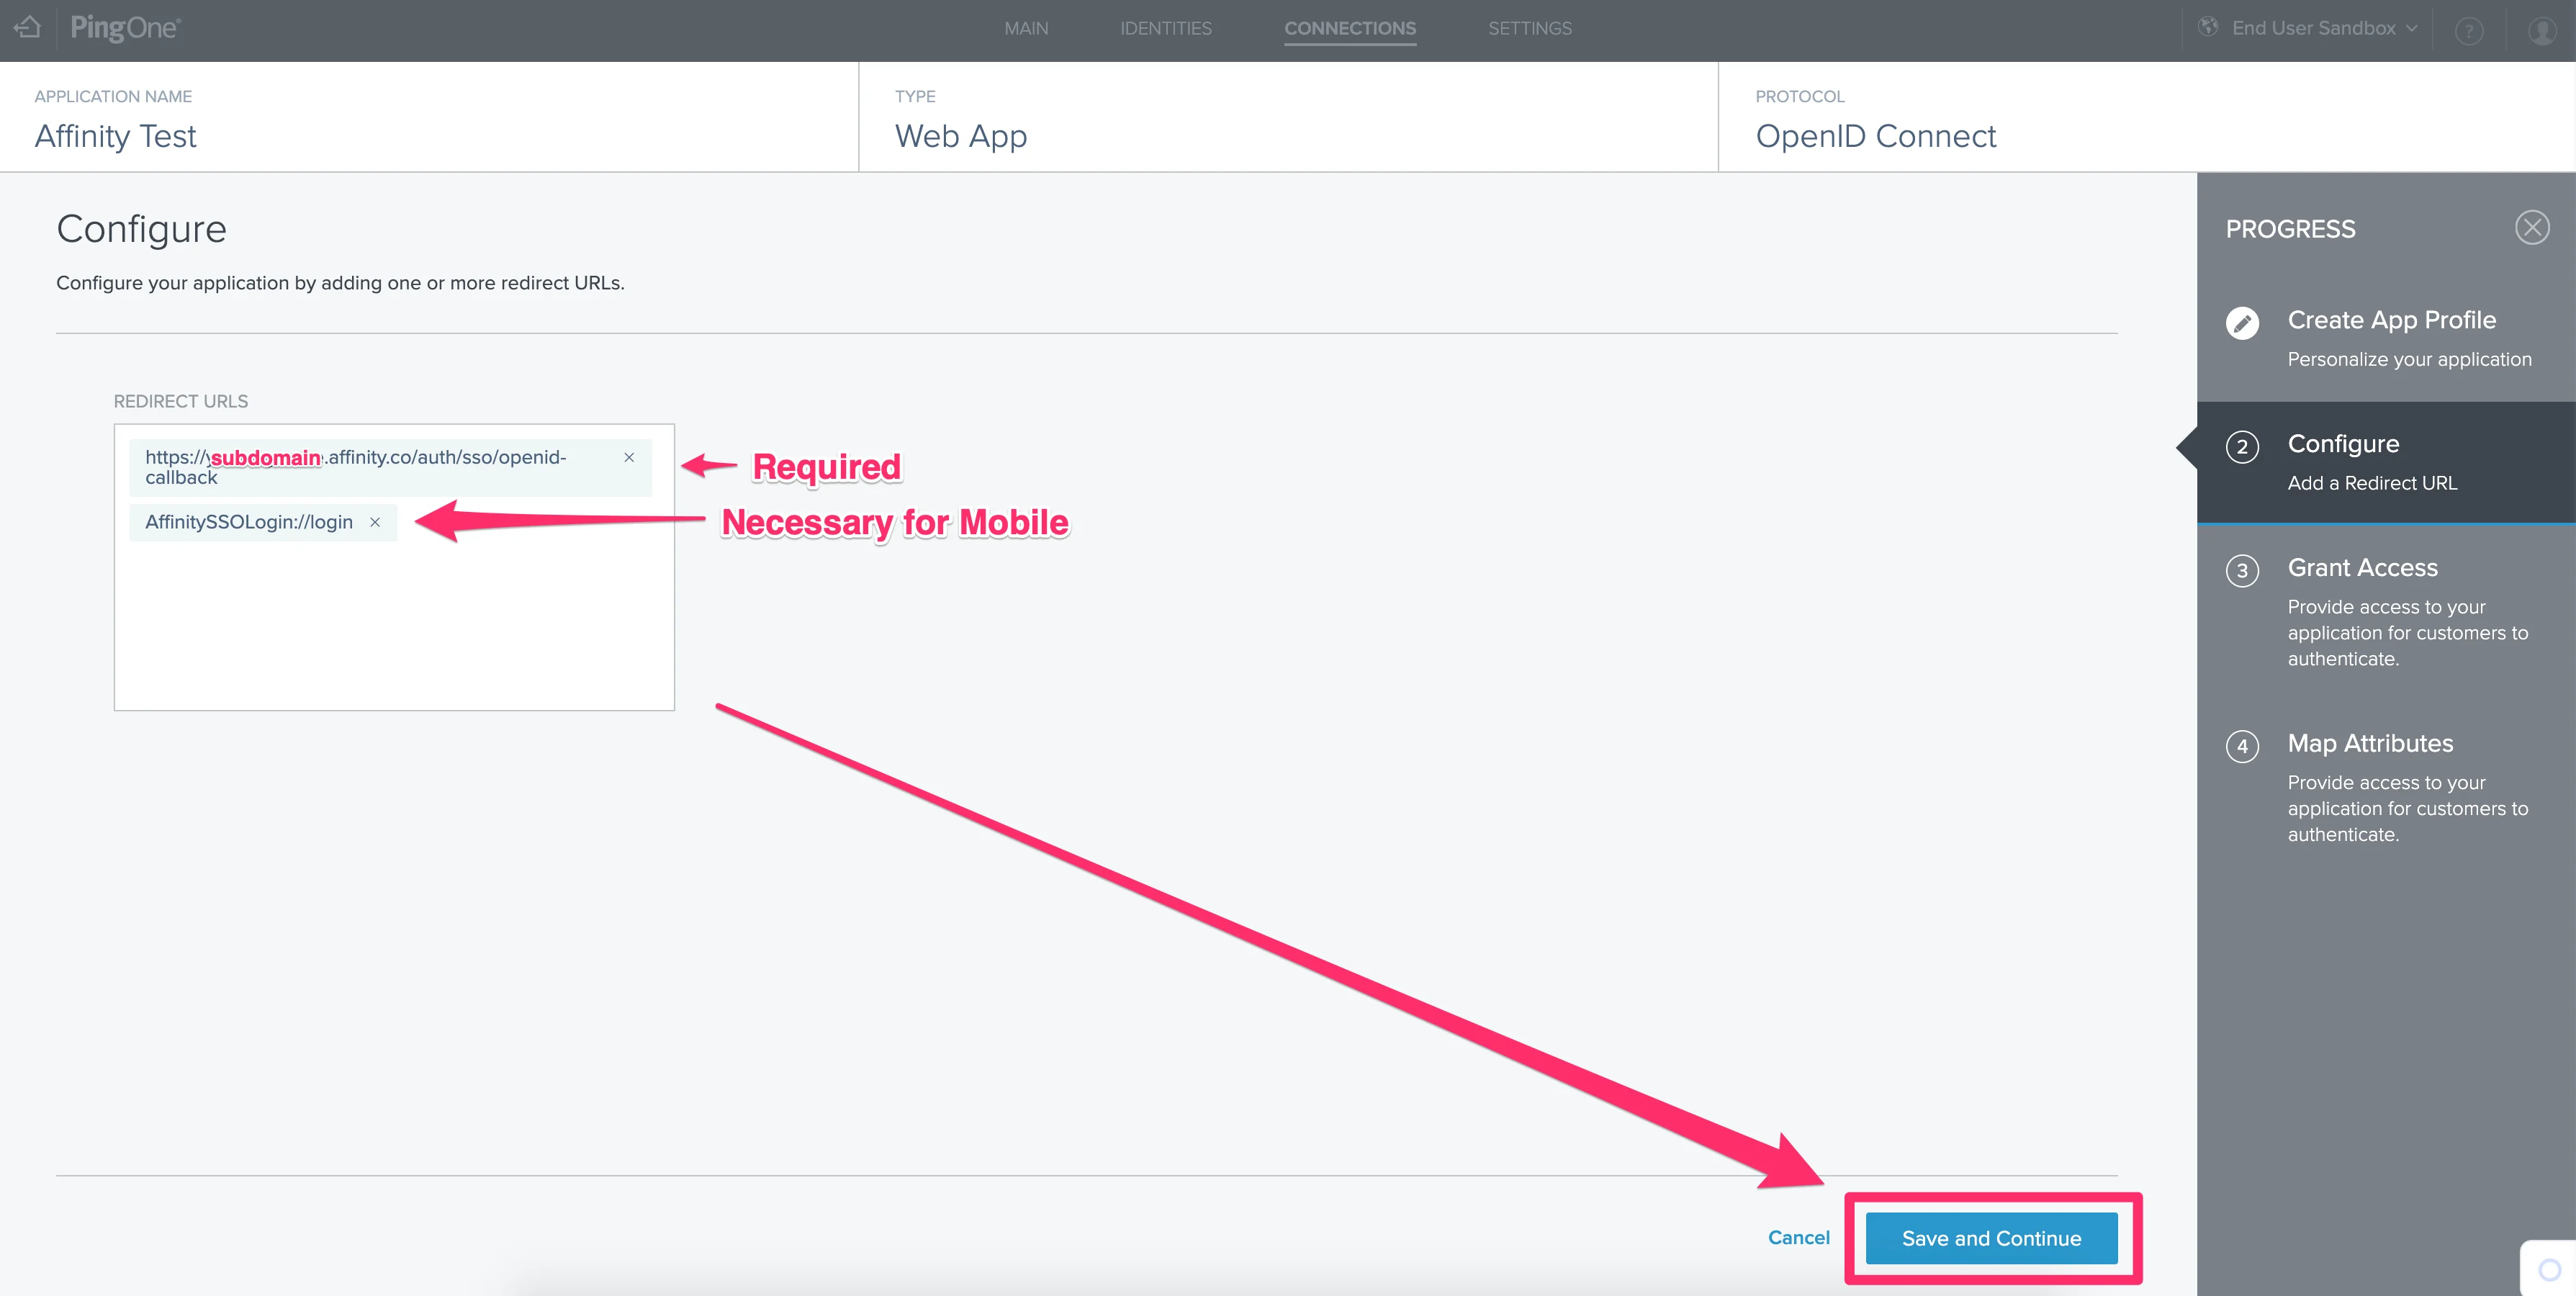
- On the next page, please fill out the appropriate redirect URLs. If you’re not sure what your Affinity subdomain is, check out the following article: How to find your Affinity subdomain
- Required:
https://[subdomain].affinity.co/auth/sso/openid-callback - For Affinity’s Mobile App:
AffinitySSOLogin://login
- Required:
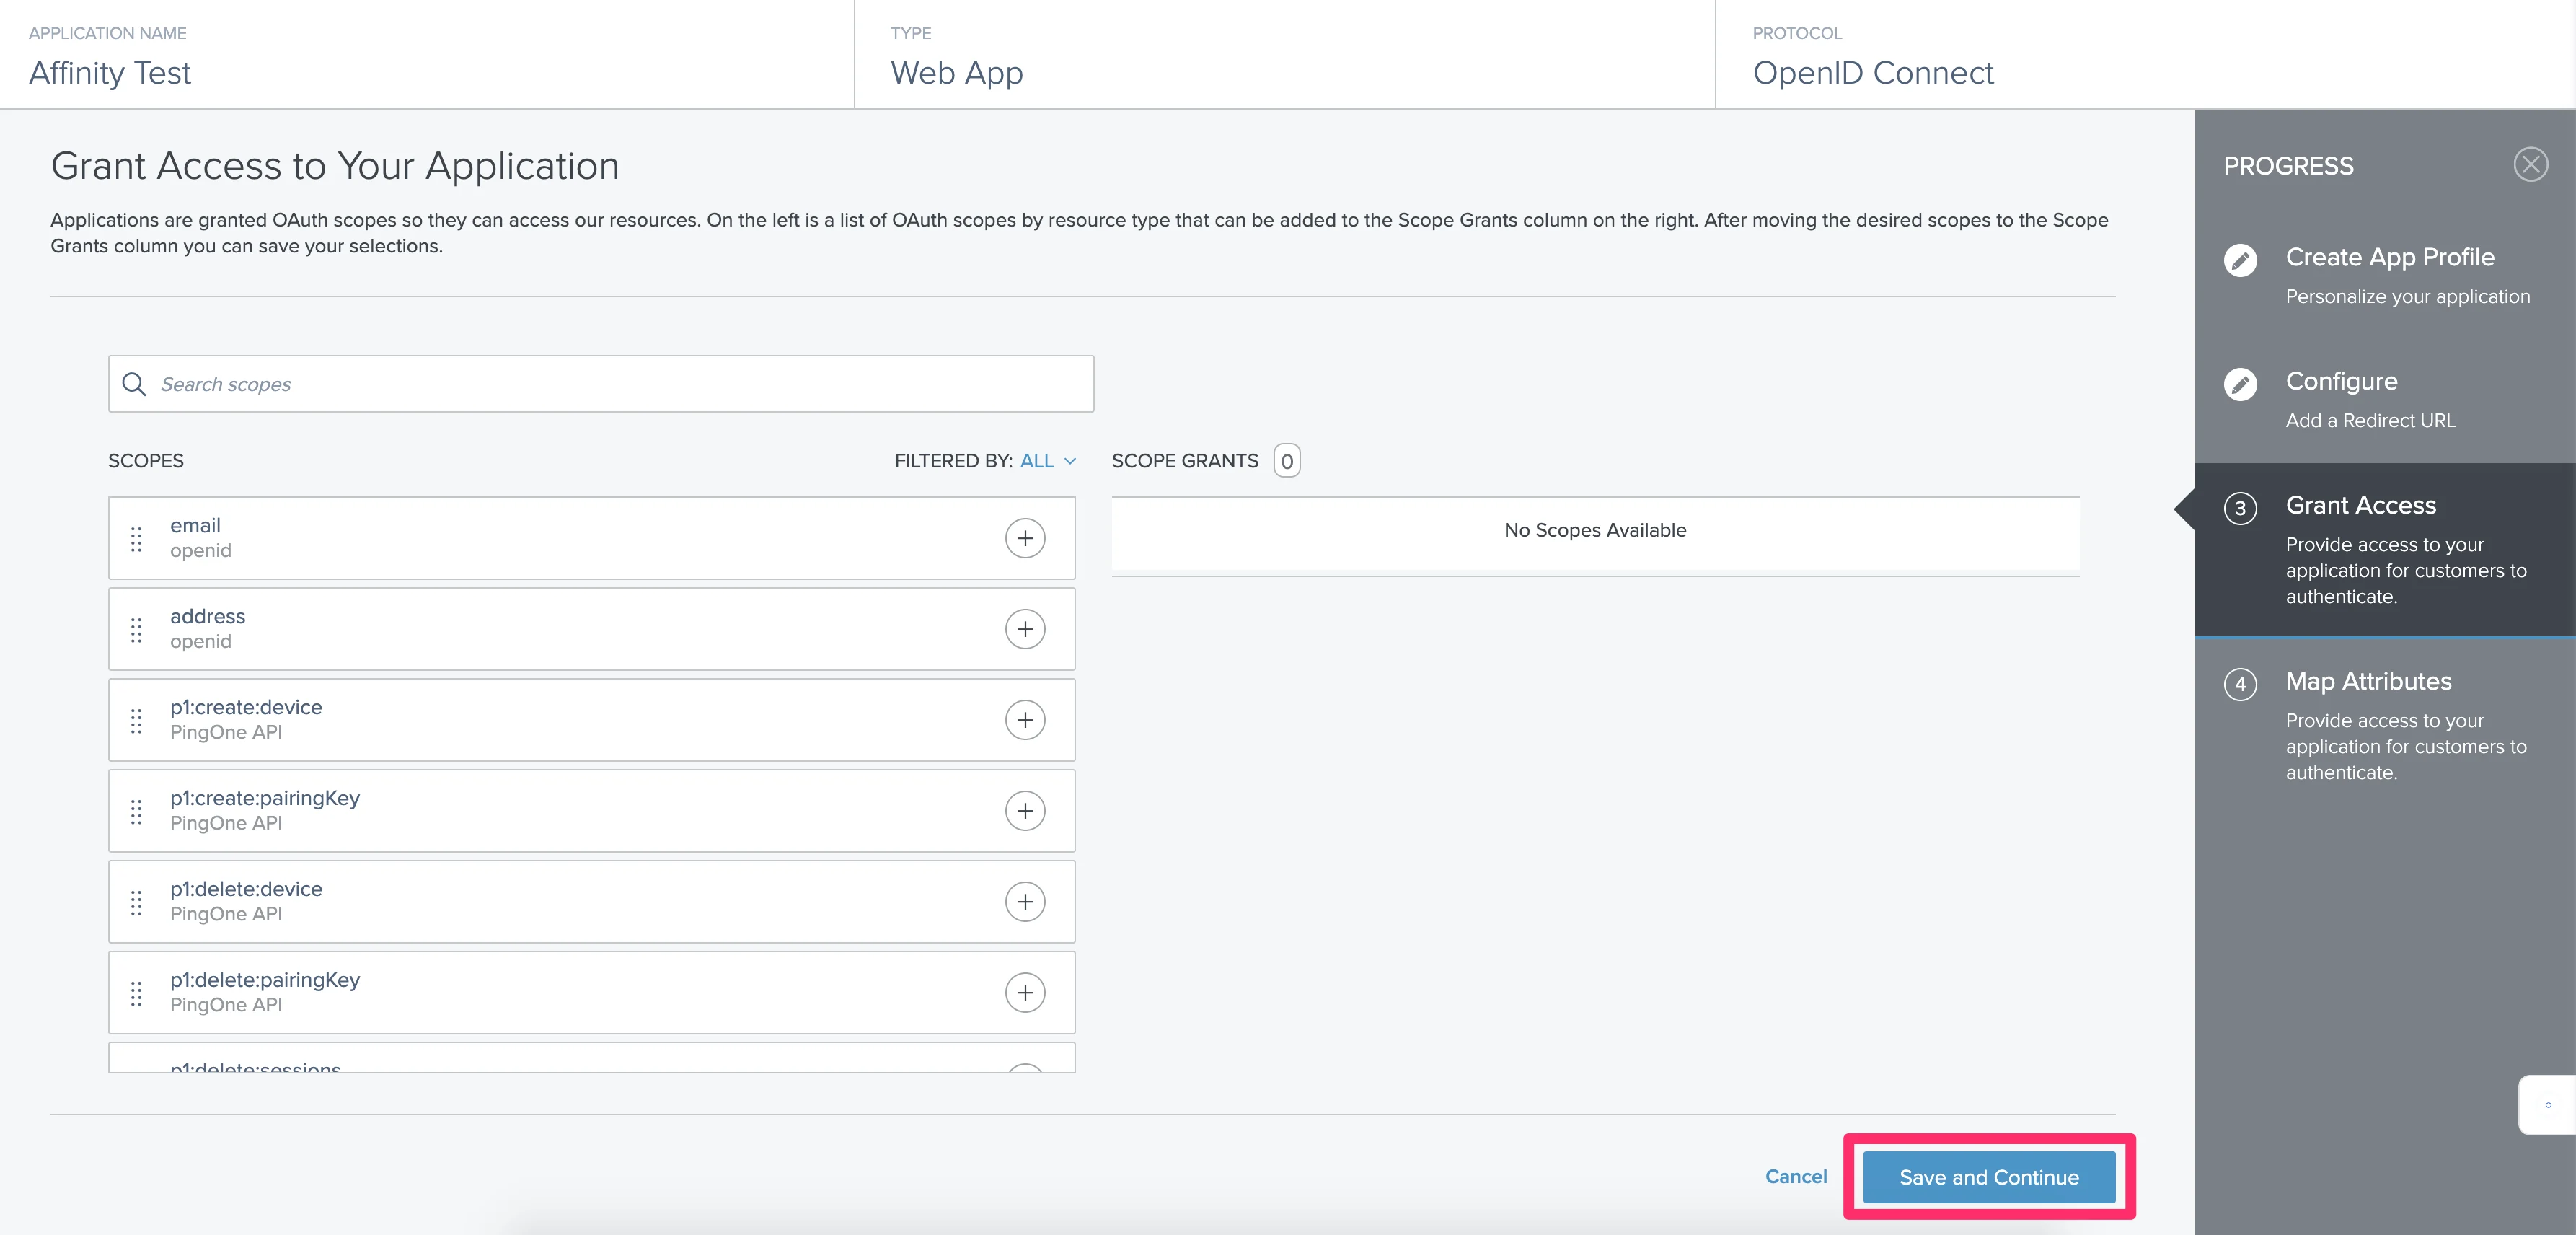
- No additional scopes are required in the section titled Grant Access to Your Application. Feel free to leave everything as is and click Save and Continue.
- Under ODIC ATTRIBUTES, please do the following:
- Click + ADD ATTRIBUTE and select “Email Address” for the PINGONE USER ATTRIBUTE field.
- Make sure to type in “email” for the APPLICATION ATTRIBUTE field.
- Make sure to click the checkbox to make it Required.
- Finally, click Save and Close.

- Now, click the Edit icon to the right.
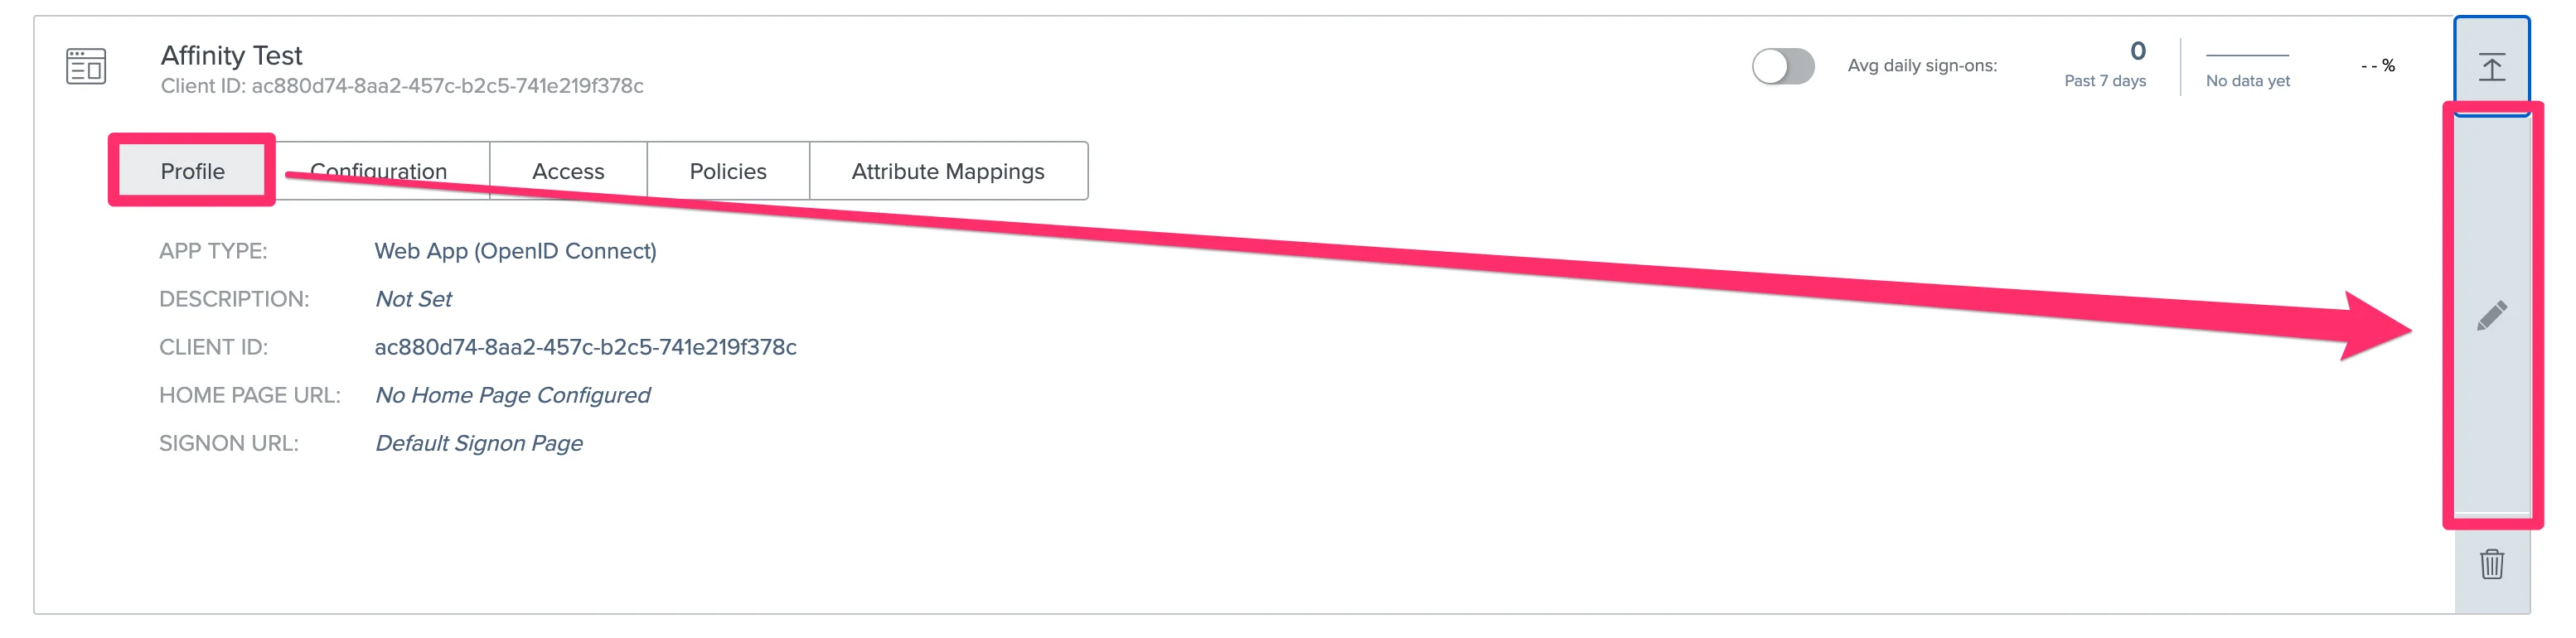
- Click on the Configuration tab, then change the TOKEN ENDPOINT AUTHENTICATION METHOD to Client Secret Post. Finally, click Save and Close.

- Now that we’re finished with the set up, please send over the following details to support@affinity.co and mention that you’re setting up Ping (OpenID):
- Client ID
- Client Secret
- OIDC Discovery Endpoint